# Table Of Contents
# 알림
알림(Notification)은 앱이 실행되고 있지 않거나 백그라운드 상태일 때 메시지를 전달하는 방법을 제공합니다. 문자 앱이나 Gmail 앱이 대표적인 알림입니다.
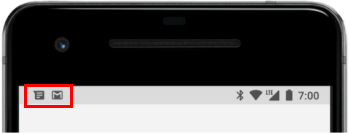
알림이 생성되면 화면 위쪽 상태 바에 아이콘으로 나타납니다.
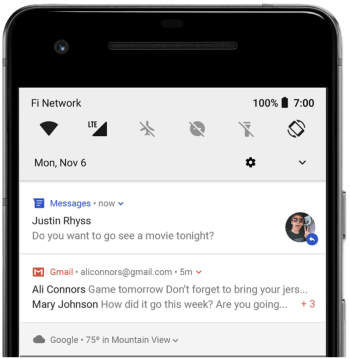
상태 바를 끌어내리면 알림 패널에서 알림의 자세한 내용을 확인할 수 있습니다.
# 알림의 종류
알림에는 두 종류가 있습니다.
- 로컬 알림(Local Notification)
- 원격 알림(Remote Notification)
# 로컬 알림
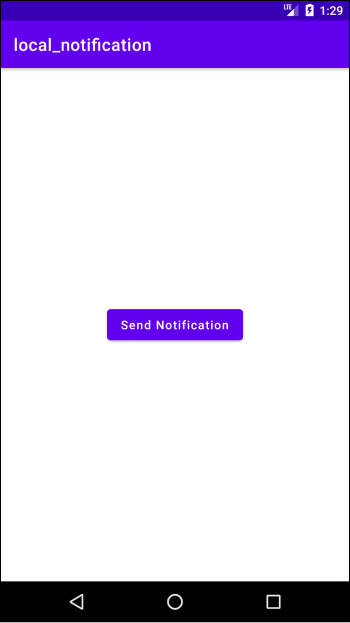
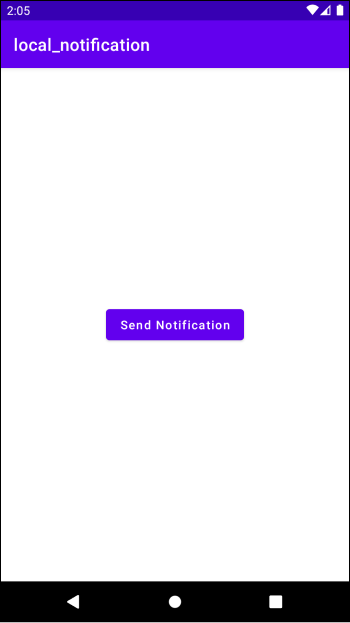
로컬 알림(Local Notification)은 기기에서 실행 중인 앱에서 생성됩니다. 버튼을 누르면 로컬 알림을 전송하는 예제를 만들어봅시다.
NotificationCompat.Builder객체를 사용하면 알림을 생성할 수 있습니다. 우선 NotificationBuilder객체를 생성합니다.
val notificationBuilder = NotificationCompat.Builder(this)
        .setSmallIcon(android.R.drawable.ic_dialog_info)
        .setContentTitle("A Notification")
        .setContentText("This is a notification")
setSmallIcon()메소드를 사용하면 알림의 아이콘을 설정할 수 있습니다. setContentTitle()메소드를 사용하면 알림의 제목을 설정할 수 있으며, setContentText()메소드를 사용하면 알림의 본문을 설정할 수 있습니다.
이제 NotificationBuilder객체의 build()메소드를 사용하여 알림을 생성합시다.
val notification = notificationBuilder.build()
알림을 보내기 위해서는 NotificationManager객체가 필요합니다. 시스템 서비스에서 다음과 같이 NotificationManager객체를 가져옵니다.
val notificationManager = getSystemService(Context.NOTIFICATION_SERVICE) as NotificationManager
마지막으로 NotificationManager객체의 notify()메소드를 사용하여 알람을 전송합니다. 이때 메소드의 첫 번째 인자로 알림의 ID를 나타내는 임의의 정수값을 전달합니다. 알람 ID는 안드로이드 시스템이 알림을 구분하는데 사용합니다.
notificationManager.notify(NOTIFICATION_ID, notification)
완성된 코드는 다음과 같습니다. 버튼을 누르면 알림을 전송합니다.
class MainActivity : AppCompatActivity() {

    lateinit var button: Button

    val NOTIFICATION_ID = 1

    override fun onCreate(savedInstanceState: Bundle?) {
        super.onCreate(savedInstanceState)
        setContentView(R.layout.activity_main)

        button = findViewById<Button>(R.id.activity_main_btn)

        button.setOnClickListener {
            val notificationBuilder = NotificationCompat.Builder(this)
                    .setSmallIcon(android.R.drawable.ic_dialog_info)
                    .setContentTitle("A Notification")
                    .setContentText("This is a notification")

            val notification = notificationBuilder.build()

            val notificationManager = getSystemService(Context.NOTIFICATION_SERVICE) as NotificationManager

            notificationManager.notify(NOTIFICATION_ID, notification)
        }
    }
}
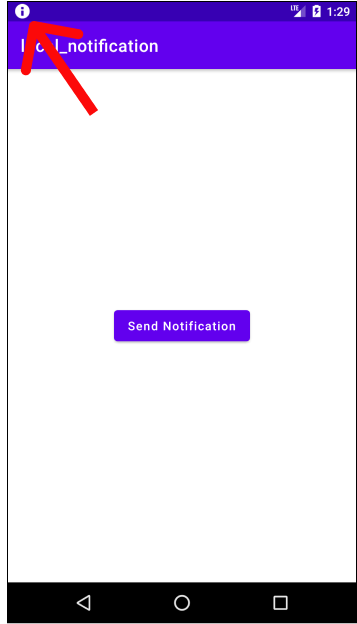
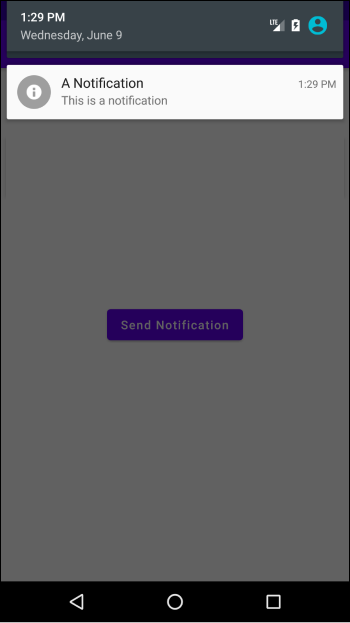
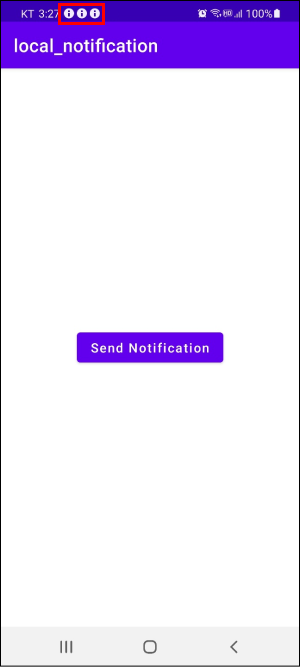
이제 앱을 실행하고 버튼을 눌러봅니다.
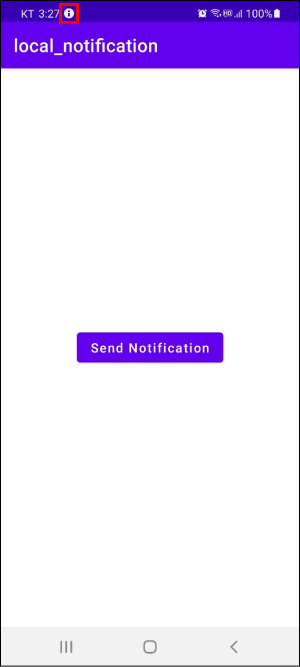
상단 상태 바에 알림 아이콘이 생성됩니다.
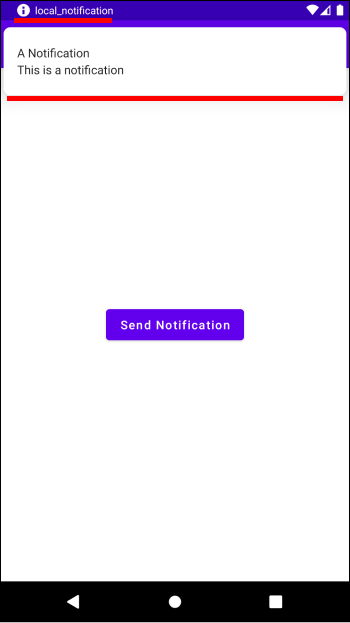
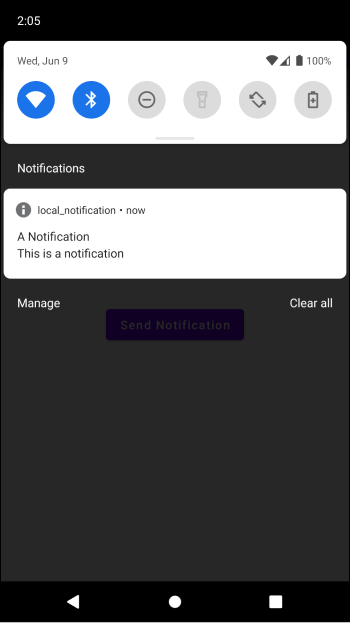
상태 바를 아래로 쓸어내리면 알림을 확인할 수 있습니다.
# Oreo 버전에서의 알림
안드로이드 API 26 (Oreo)부터는 알림을 사용하는 방식이 변경되었습니다. 따라서 버전에 따른 분기처리를 해야합니다.
if (Build.VERSION.SDK_INT >= Build.VERSION_CODES.O) {
    // 오레오 버전 이상
    // ...
} else {
    // 오레오 이전 버전
    // 위 코드와 동일
    val notificationBuilder = NotificationCompat.Builder(this)
            .setSmallIcon(android.R.drawable.ic_dialog_info)
            .setContentTitle("A Notification")
            .setContentText("This is a notification")

    val notification = notificationBuilder.build()

    val notificationManager = getSystemService(Context.NOTIFICATION_SERVICE) as NotificationManager

    notificationManager.notify(NOTIFICATION_ID, notification)
}
Oreo 이후 버전부터는 알림을 사용할 때 Notification Channel을 지정해야합니다.
# Notification Channel
Oreo 이하 버전에서는 모든 알림이 하나의 Notification Channel로 관리됐습니다. 이 때문에 스마트폰에 알림이 쌓이길 원하지 않아 알림을 끄면, 모든 알림을 받을 수 없었습니다.
Oreo 버전부터는 알림을 여러 채널 별로 분리하여 사용자가 확인하고 싶은 알림과 보고싶지 않은 알림을 직접 설정할 수 있습니다. 각 채널별 수신 여부 외에도 잠금화면 표시 여부, 소리 설정, 진동 설정 등 여러 옵션을 세밀하게 설정할 수 있습니다.
우선 다음과 같이 NotificationChannel 객체를 생성합니다.
val channelId = "channel_id"
val channelName = "channel_name"
val channelDescription = "channel_description"
val importance = NotificationManager.IMPORTANCE_HIGH

val notificationChannel = NotificationChannel(channelId, channelName, importance)
notificationChannel.description = channelDescription
NotificationChannel객체를 생성할 때 사용하는 id, name, importance, description은 다음과 같습니다.
- id: 각 채널을 구분할 수 있는 고유한 값
- name: 사용자에게 표시되는 채널의 이름
- description: 채널에 대한 설명, 특정 채널 설정 창에서 표시됩니다.
- importance: 알림에 대한 중요도, 이 값에 따라 알림이 다르게 똥작합니다. importance 값에 따른 동작은 이 곳 (opens new window)에서 확인할 수 있습니다.
Notification Manager에 채널을 등록합니다.
val notificationManager = getSystemService(Context.NOTIFICATION_SERVICE) as NotificationManager
notificationManager.createNotificationChannel(notificationChannel)
NotificationBuilder를 생성합니다. 이 때 Builer()의 두 번째 인자로 채널의 id를 전달합니다.
val notificationBuilder = NotificationCompat.Builder(this, channelId)
    .setSmallIcon(android.R.drawable.ic_dialog_info)
    .setContentTitle("A Notification")
    .setContentText("This is a notification")
Notification을 생성합니다.
val notification = notificationBuilder.build()
NotificationManager의 notify()메소드를 호출하여 알림을 전송합니다.
notificationManager.notify(NOTIFICATION_ID, notification)
전체 코드는 다음과 같습니다.
class MainActivity : AppCompatActivity() {

    lateinit var button: Button

    val NOTIFICATION_ID = 1

    override fun onCreate(savedInstanceState: Bundle?) {
        super.onCreate(savedInstanceState)
        setContentView(R.layout.activity_main)

        button = findViewById<Button>(R.id.activity_main_btn)
        button.setOnClickListener {

            if (Build.VERSION.SDK_INT >= Build.VERSION_CODES.O) {

                val channelId = "channel_id"
                val channelName = "channel_name"
                val channelDescription = "channel_description"
                val importance = NotificationManager.IMPORTANCE_HIGH

                val notificationChannel = NotificationChannel(channelId, channelName, importance)
                notificationChannel.description = channelDescription

                val notificationManager = getSystemService(Context.NOTIFICATION_SERVICE) as NotificationManager
                notificationManager.createNotificationChannel(notificationChannel)

                val notificationBuilder = NotificationCompat.Builder(this, channelId)
                        .setSmallIcon(android.R.drawable.ic_dialog_info)
                        .setContentTitle("A Notification")
                        .setContentText("This is a notification")

                val notification = notificationBuilder.build()

                notificationManager.notify(NOTIFICATION_ID, notification)

            } else {
                // 오레오 이전 버전
            }
        }
    }
}
이제 앱을 실행하고 버튼을 클릭합시다.
다음과 같이 화면에 알림 상자가 나오며, 상태바에 알림 아이콘이 생성됩니다.
상태 바를 아래로 쓸어내리면 자세한 내용을 확인할 수 있습니다.
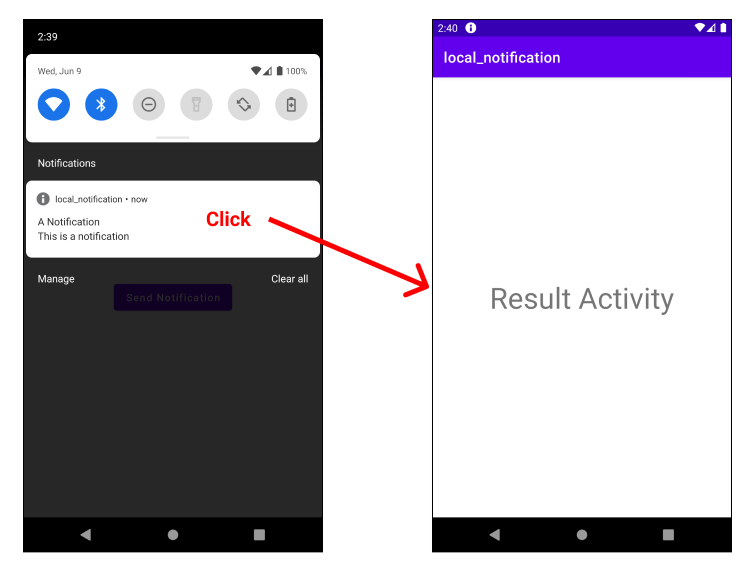
# 알림에서 액티비티 시작시키기
현재는 알림 패널에서 알림을 클릭해도 아무 일이 일어나지 않습니다.
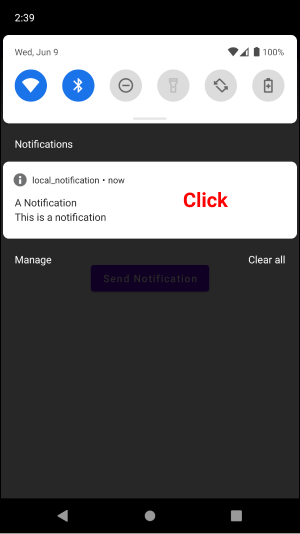
알림을 클릭했을 때 특정 액티비티가 실행되도록 할 수 있습니다.
우선 실행할 액티비티를 포함하는 명시적 인텐트를 생성합니다.
val resultIntent = Intent(this@MainActivity, ResultActivity::class.java)
그리고 이 인텐트를 PendingIntent에 포함시킵니다.
val REQUEST_CODE = 1

val pendingIntent = PendingIntent.getActivity(this@MainActivity, REQUEST_CODE, resultIntent, PendingIntent.FLAG_UPDATE_CURRENT)
마지막으로 NotificationBuilder클래스의 setContentIntent()메소드를 호출하면서 인자로 pendingIntent를 전달합니다.
notificationBuilder.setContentIntent(pendingIntent)
전체 코드는 다음과 같습니다.
class MainActivity : AppCompatActivity() {

    lateinit var button: Button

    val REQUEST_CODE = 1
    val NOTIFICATION_ID = 1

    override fun onCreate(savedInstanceState: Bundle?) {
        super.onCreate(savedInstanceState)
        setContentView(R.layout.activity_main)

        button = findViewById<Button>(R.id.activity_main_btn)
        button.setOnClickListener {

            if (Build.VERSION.SDK_INT >= Build.VERSION_CODES.O) {

                val channelId = "channel_id"
                val channelName = "channel_name"
                val channelDescription = "channel_description"
                val importance = NotificationManager.IMPORTANCE_HIGH

                val notificationChannel = NotificationChannel(channelId, channelName, importance)
                notificationChannel.description = channelDescription

                val notificationManager = getSystemService(Context.NOTIFICATION_SERVICE) as NotificationManager
                notificationManager.createNotificationChannel(notificationChannel)

                val notificationBuilder = NotificationCompat.Builder(this, channelId)
                        .setSmallIcon(android.R.drawable.ic_dialog_info)
                        .setContentTitle("A Notification")
                        .setContentText("This is a notification")

                val resultIntent = Intent(this@MainActivity, ResultActivity::class.java)
                val pendingIntent = PendingIntent.getActivity(this@MainActivity, REQUEST_CODE, resultIntent, PendingIntent.FLAG_UPDATE_CURRENT)
                notificationBuilder.setContentIntent(pendingIntent)

                val notification = notificationBuilder.build()

                notificationManager.notify(NOTIFICATION_ID, notification)

            } else {
                // ...
            }
        }
    }
}
이제 알림 패널에서 알림을 클릭하면 ResultActivity가 실행됩니다.
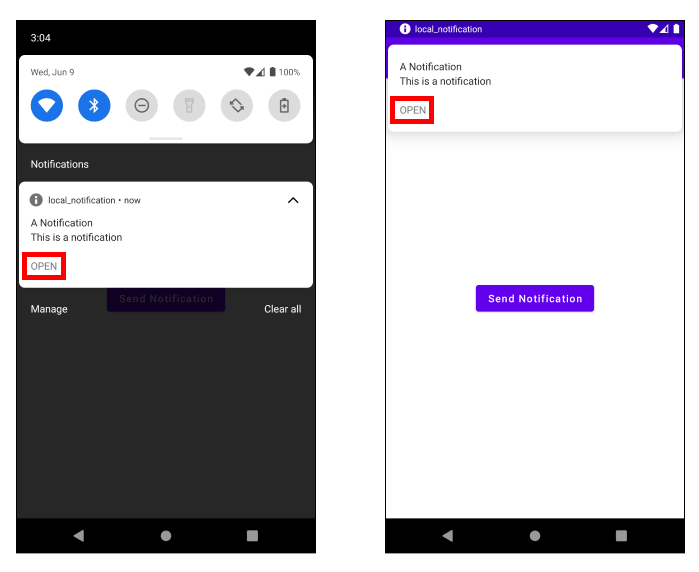
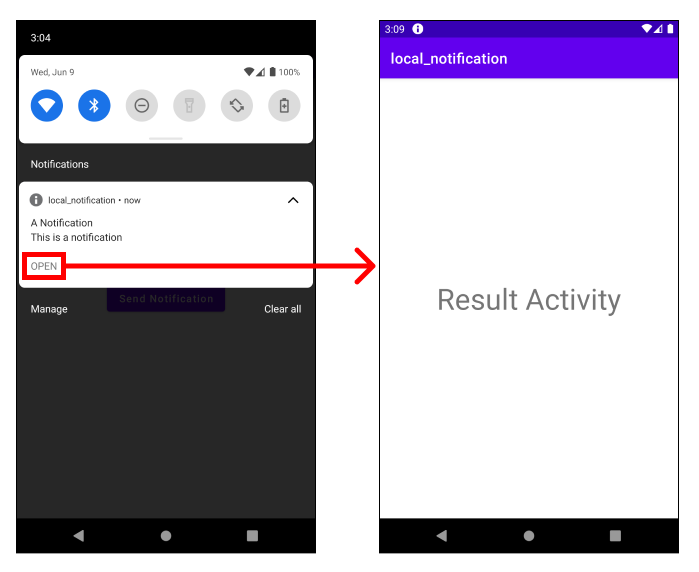
# 알림에 액션 버튼 추가하기
알림에는 버튼이 포함될 수 있습니다. 이를 액션 버튼이라고 합니다.
액션은 다음과 같이 생성할 수 있습니다.
val action = NotificationCompat.Action.Builder(
    android.R.drawable.sym_action_chat,
    "OPEN",
    pendingIntent
).build()
생성된 액션은 NotificationBuilder객체의 addAction()메소드를 사용하여 추가합니다.
notificationBuilder.addAction(action)
전체 코드는 다음과 같습니다.
class MainActivity : AppCompatActivity() {

    lateinit var button: Button

    val REQUEST_CODE = 1
    val NOTIFICATION_ID = 1

    override fun onCreate(savedInstanceState: Bundle?) {
        super.onCreate(savedInstanceState)
        setContentView(R.layout.activity_main)

        button = findViewById<Button>(R.id.activity_main_btn)
        button.setOnClickListener {

            if (Build.VERSION.SDK_INT >= Build.VERSION_CODES.O) {

                val channelId = "channel_id"
                val channelName = "channel_name"
                val channelDescription = "channel_description"
                val importance = NotificationManager.IMPORTANCE_HIGH

                val notificationChannel = NotificationChannel(channelId, channelName, importance)
                notificationChannel.description = channelDescription

                val notificationManager = getSystemService(Context.NOTIFICATION_SERVICE) as NotificationManager
                notificationManager.createNotificationChannel(notificationChannel)

                val notificationBuilder = NotificationCompat.Builder(this, channelId)
                    .setSmallIcon(android.R.drawable.ic_dialog_info)
                    .setContentTitle("A Notification")
                    .setContentText("This is a notification")

                val resultIntent = Intent(this@MainActivity, ResultActivity::class.java)
                val pendingIntent = PendingIntent.getActivity(this@MainActivity, REQUEST_CODE, resultIntent, PendingIntent.FLAG_UPDATE_CURRENT)
                notificationBuilder.setContentIntent(pendingIntent)

                val action = NotificationCompat.Action.Builder(
                    android.R.drawable.sym_action_chat,
                    "OPEN",
                    pendingIntent
                ).build()

                notificationBuilder.addAction(action)

                val notification = notificationBuilder.build()

                notificationManager.notify(NOTIFICATION_ID, notification)

            } else {
                // ...
            }
        }
    }
}
이제 알림 패널에서 액션 버튼을 클릭하면 ResultActivity가 실행됩니다.
# 알림 메시지 묶기
같은 앱에서 여러 알림을 보낼 때 다음과 같이 묶을 수 있습니다. 예제를 살펴보겠습니다. 버튼을 눌렀을 때 다음과 같이 세 개의 알림을 보내봅시다.
button.setOnClickListener {

    val NOTIFICATION_1_ID = 1
    val NOTIFICATION_2_ID = 2
    val NOTIFICATION_3_ID = 3

    val notification1 = NotificationCompat.Builder(this, channelId)
        .setSmallIcon(android.R.drawable.ic_dialog_info)
        .setContentTitle("A Notification 1")
        .setContentText("This is a notification 1")
        .build()

    val notification2 = NotificationCompat.Builder(this, channelId)
        .setSmallIcon(android.R.drawable.ic_dialog_info)
        .setContentTitle("A Notification 2")
        .setContentText("This is a notification 2")
        .build()

    val notification3 = NotificationCompat.Builder(this, channelId)
        .setSmallIcon(android.R.drawable.ic_dialog_info)
        .setContentTitle("A Notification 3")
        .setContentText("This is a notification 3")
        .build()

    notificationManager.notify(NOTIFICATION_1_ID, notification1)
    notificationManager.notify(NOTIFICATION_2_ID, notification2)
    notificationManager.notify(NOTIFICATION_3_ID, notification3)
}
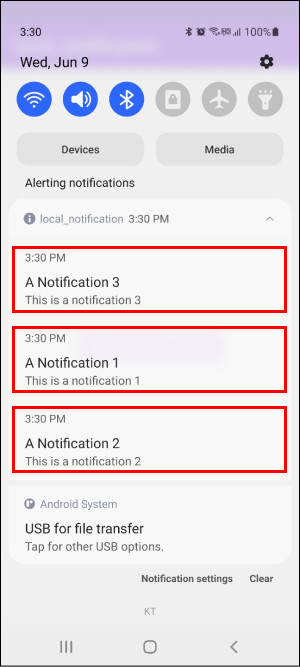
이제 버튼을 누르면 상단 상태바에 세 개의 알림을 확인할 수 있습니다.
알람 패널에도 세 개의 알림이 있습니다.

NotificationCompat.Builder클래스의 setGroup()과 setGroupSummary()를 사용하면 연관된 알람들을 한 개의 알람으로 묶을 수 있습니다. 코드를 다음과 같이 수정해봅시다.
button.setOnClickListener {

    val NOTIFICATION_GROUP_ID = 0
    val NOTIFICATION_1_ID = 1
    val NOTIFICATION_2_ID = 2
    val NOTIFICATION_3_ID = 3

    val NOTIFICATION_GROUP_KEY = "notification_group_key"

    val notification1 = NotificationCompat.Builder(this, channelId)
        .setSmallIcon(android.R.drawable.ic_dialog_info)
        .setContentTitle("A Notification 1")
        .setContentText("This is a notification 1")
        .setGroup(NOTIFICATION_GROUP_KEY)
        .build()

    val notification2 = NotificationCompat.Builder(this, channelId)
        .setSmallIcon(android.R.drawable.ic_dialog_info)
        .setContentTitle("A Notification 2")
        .setContentText("This is a notification 2")
        .setGroup(NOTIFICATION_GROUP_KEY)
        .build()

    val notification3 = NotificationCompat.Builder(this, channelId)
        .setSmallIcon(android.R.drawable.ic_dialog_info)
        .setContentTitle("A Notification 3")
        .setContentText("This is a notification 3")
        .setGroup(NOTIFICATION_GROUP_KEY)
        .build()

    val summaryNotification = NotificationCompat.Builder(this, channelId)
        .setSmallIcon(android.R.drawable.ic_dialog_info)
        .setContentTitle("Summary Notification")
        .setContentText("This is a summary notification")
        .setGroup(NOTIFICATION_GROUP_KEY)
        .setGroupSummary(true)
        .build()

    notificationManager.notify(NOTIFICATION_1_ID, notification1)
    notificationManager.notify(NOTIFICATION_2_ID, notification2)
    notificationManager.notify(NOTIFICATION_3_ID, notification3)
    notificationManager.notify(NOTIFICATION_GROUP_ID, summaryNotification)
}
이제 앱을 실행합니다. 버튼을 클릭하면 상단 상태바에 한 개의 알람만 확인할 수 있습니다.
알람 패널에는 연관된 세 개의 알람이 그룹으로 묶여있습니다.
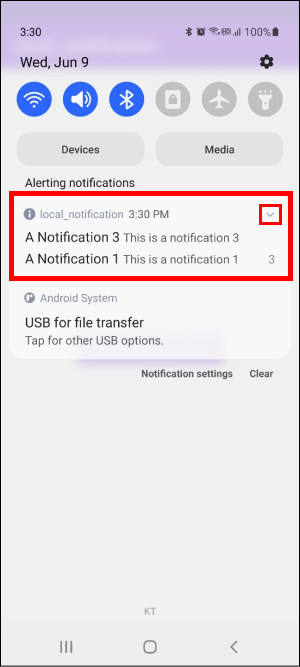
그룹을 클릭하면 세 개의 알람을 모두 확인할 수 있습니다.
전체 코드는 다음과 같습니다.
class MainActivity : AppCompatActivity() {

    lateinit var button: Button

    val NOTIFICATION_GROUP_ID = 0
    val NOTIFICATION_1_ID = 1
    val NOTIFICATION_2_ID = 2
    val NOTIFICATION_3_ID = 3

    val NOTIFICATION_GROUP_KEY = "notification_group_key"

    override fun onCreate(savedInstanceState: Bundle?) {
        super.onCreate(savedInstanceState)
        setContentView(R.layout.activity_main)

        button = findViewById<Button>(R.id.activity_main_btn)
        button.setOnClickListener {

            if (Build.VERSION.SDK_INT >= Build.VERSION_CODES.O) {

                val channelId = "channel_id"
                val channelName = "channel_name"
                val channelDescription = "channel_description"
                val importance = NotificationManager.IMPORTANCE_HIGH

                val notificationChannel = NotificationChannel(channelId, channelName, importance)
                notificationChannel.description = channelDescription

                val notificationManager = getSystemService(Context.NOTIFICATION_SERVICE) as NotificationManager
                notificationManager.createNotificationChannel(notificationChannel)

                val notification1 = NotificationCompat.Builder(this, channelId)
                        .setSmallIcon(android.R.drawable.ic_dialog_info)
                        .setContentTitle("A Notification 1")
                        .setContentText("This is a notification 1")
                        .setGroup(NOTIFICATION_GROUP_KEY)
                        .build()

                val notification2 = NotificationCompat.Builder(this, channelId)
                        .setSmallIcon(android.R.drawable.ic_dialog_info)
                        .setContentTitle("A Notification 2")
                        .setContentText("This is a notification 2")
                        .setGroup(NOTIFICATION_GROUP_KEY)
                        .build()

                val notification3 = NotificationCompat.Builder(this, channelId)
                        .setSmallIcon(android.R.drawable.ic_dialog_info)
                        .setContentTitle("A Notification 3")
                        .setContentText("This is a notification 3")
                        .setGroup(NOTIFICATION_GROUP_KEY)
                        .build()

                val summaryNotification = NotificationCompat.Builder(this, channelId)
                        .setSmallIcon(android.R.drawable.ic_dialog_info)
                        .setContentTitle("Summary Notification")
                        .setContentText("This is a summary notification")
                        .setGroup(NOTIFICATION_GROUP_KEY)
                        .setGroupSummary(true)
                        .build()

                notificationManager.notify(NOTIFICATION_1_ID, notification1)
                notificationManager.notify(NOTIFICATION_2_ID, notification2)
                notificationManager.notify(NOTIFICATION_3_ID, notification3)
                notificationManager.notify(NOTIFICATION_GROUP_ID, summaryNotification)

            } else {
                // ..
            }
        }
    }
}
# 원격 알림
구글 파이어베이스의 클라우드 메시징(Cloud Messaging)서비스를 사용하면 원격 알림(Remote Notification)을 구현할 수 있습니다.
# 파이어베이스 프로젝트 만들기
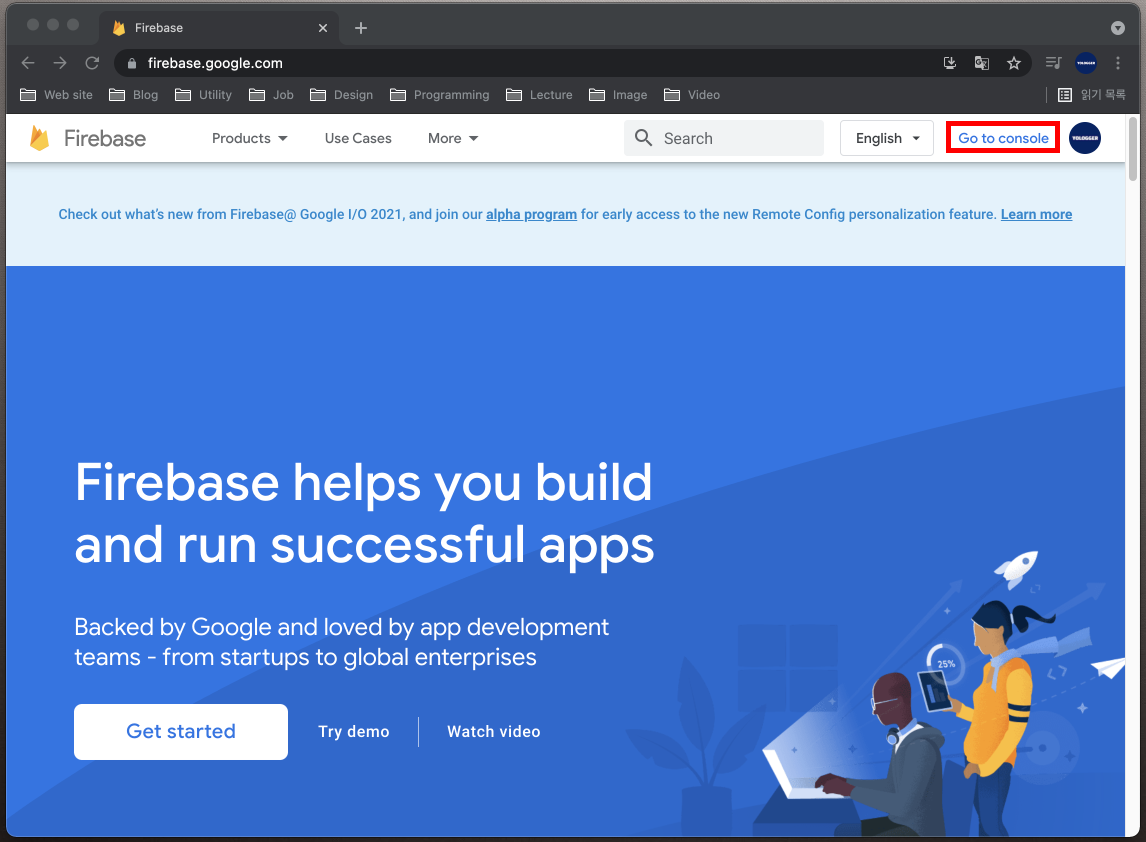
우선 파이어베이스 (opens new window)에 접속하여 로그인합니다. 계정이 없다면 회원가입을 먼저 합니다. 이후 오른쪽 상단의 Go to console을 클릭합니다.
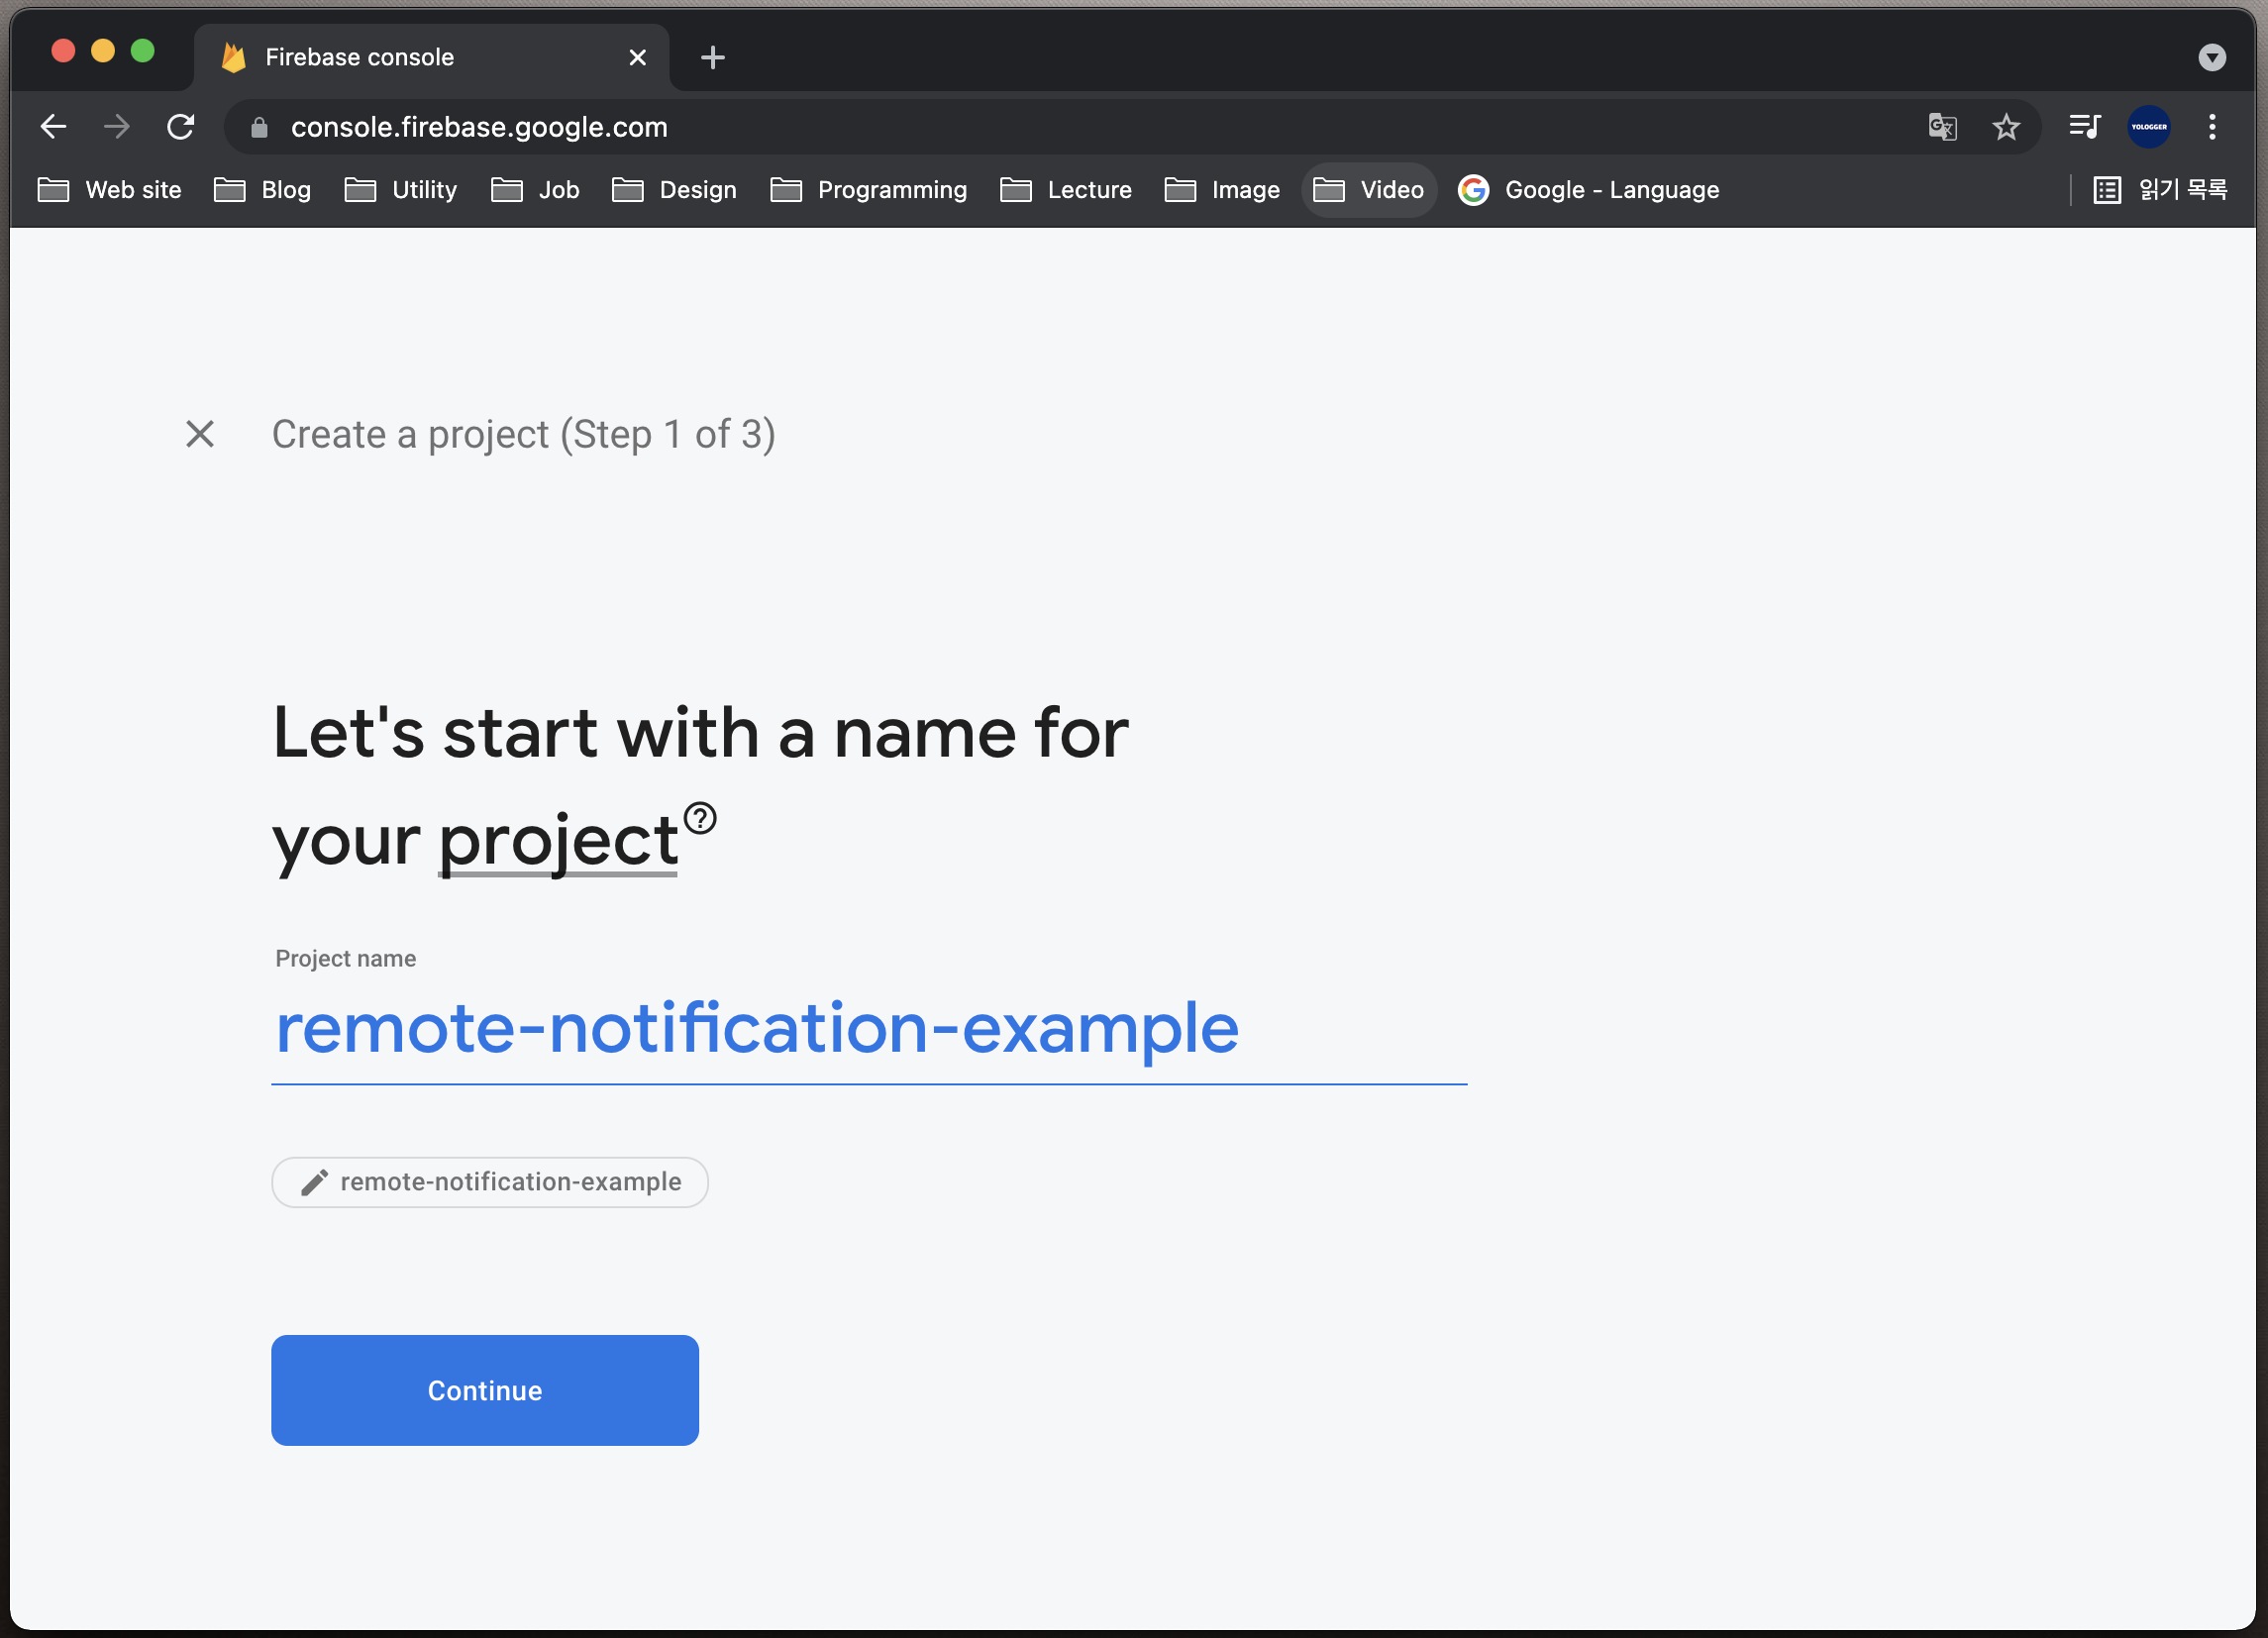
Add Project를 클릭하여 파이어베이스 프로젝트를 생성합니다.

프로젝트 이름을 입력하고 계속을 누릅니다.
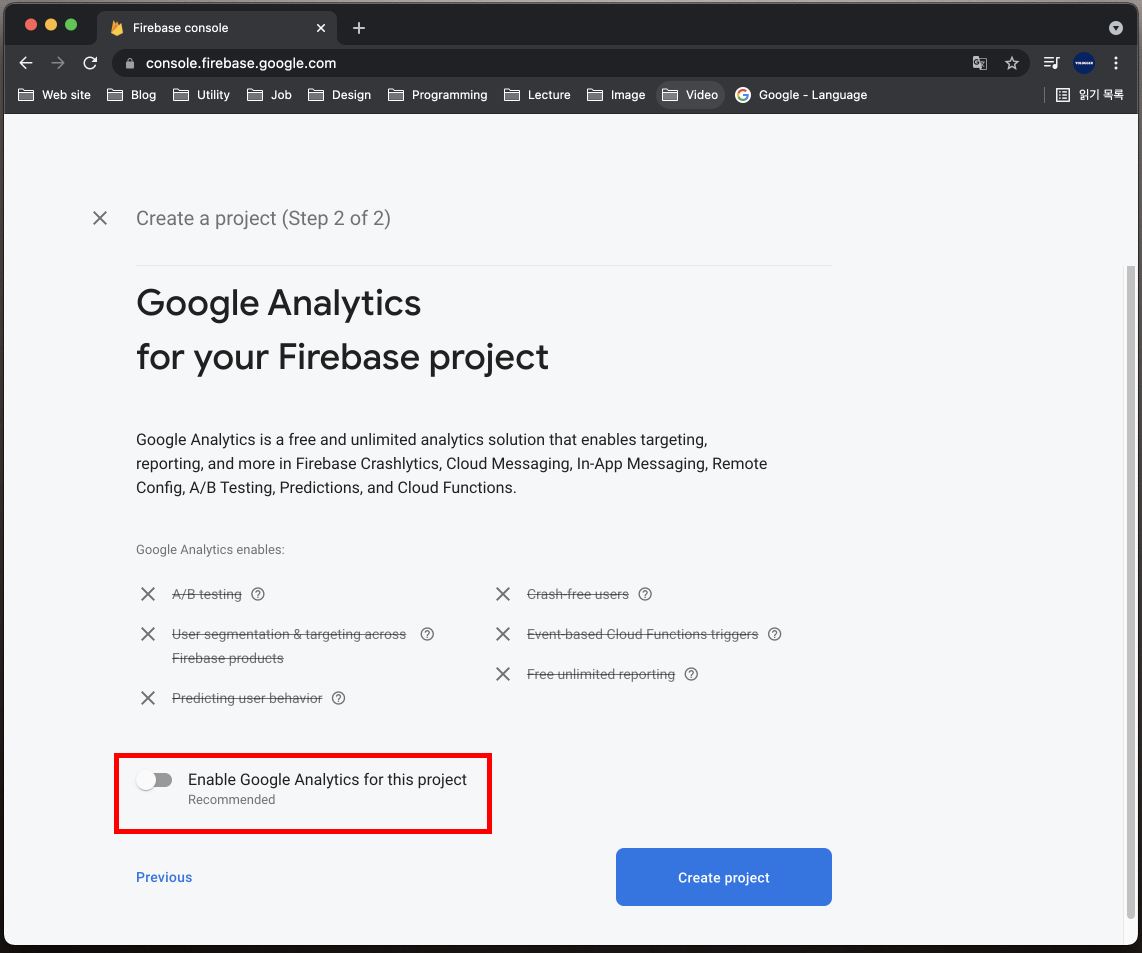
구글 에널리틱스를 사용할 것인지를 물어봅니다. 이때는 구글 에널리틱스 계정이 필요합니다. 일단 사용하지 않음을 선택하고 프로젝트를 생성합시다.
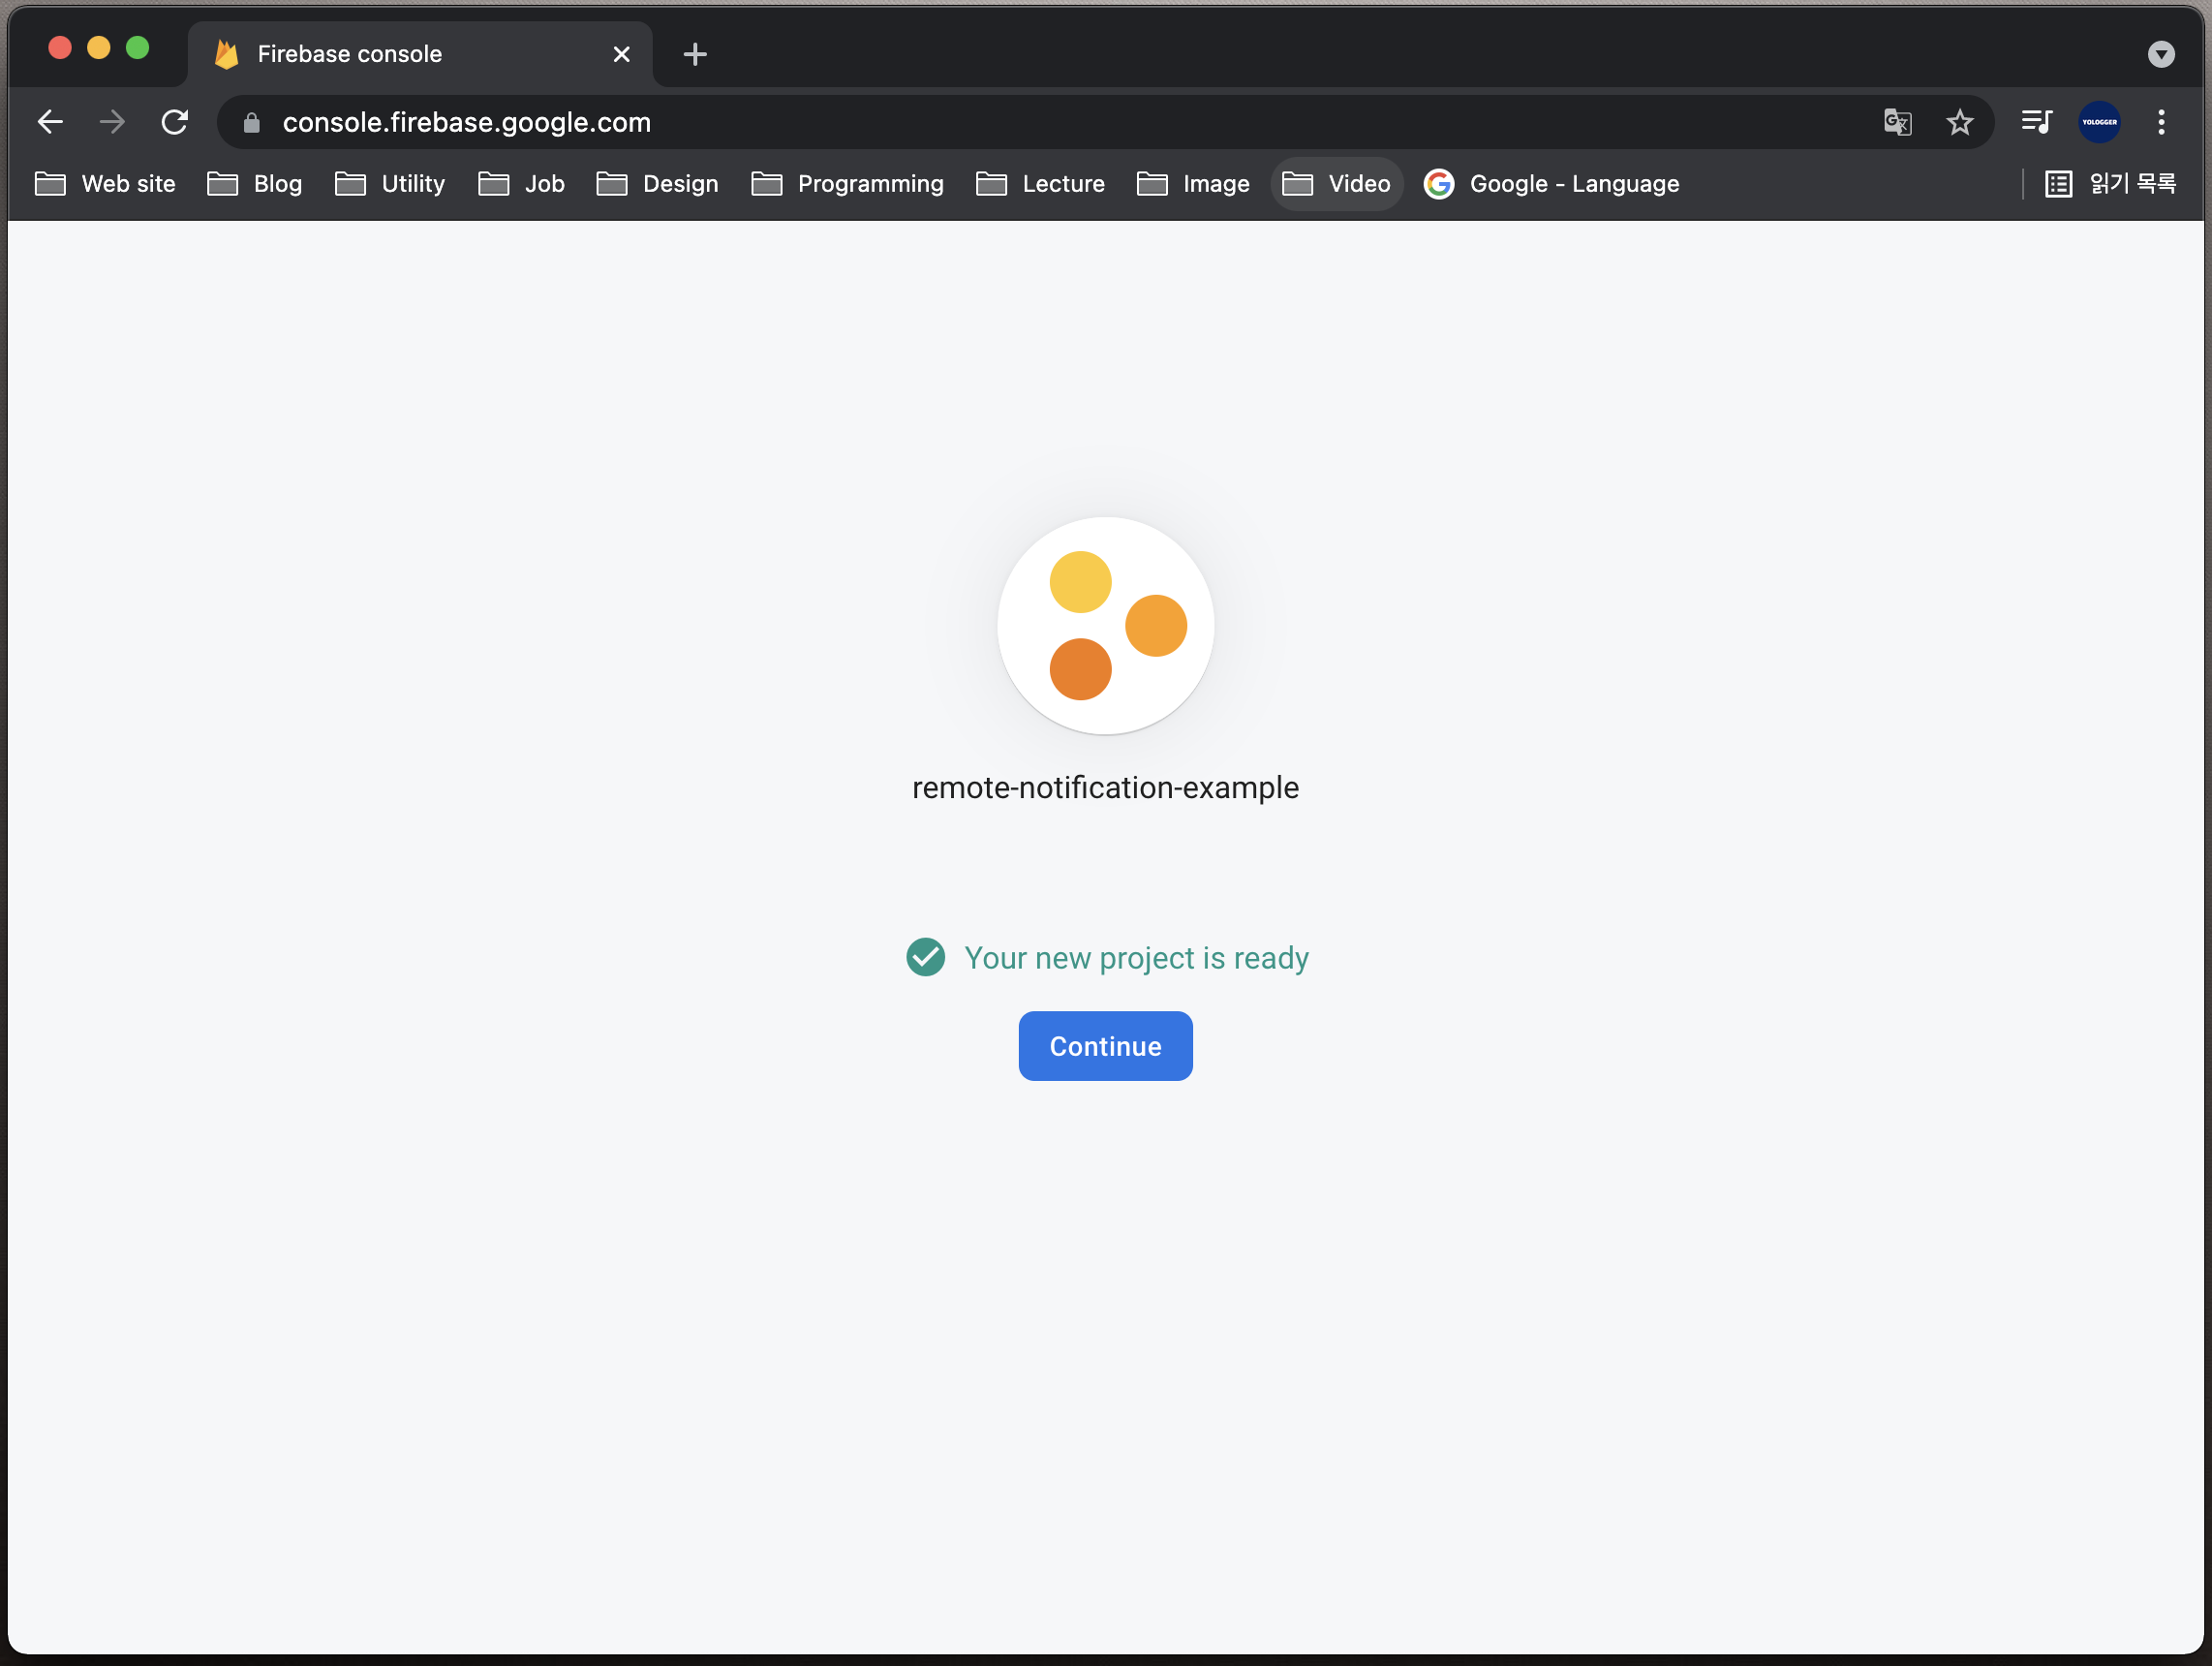
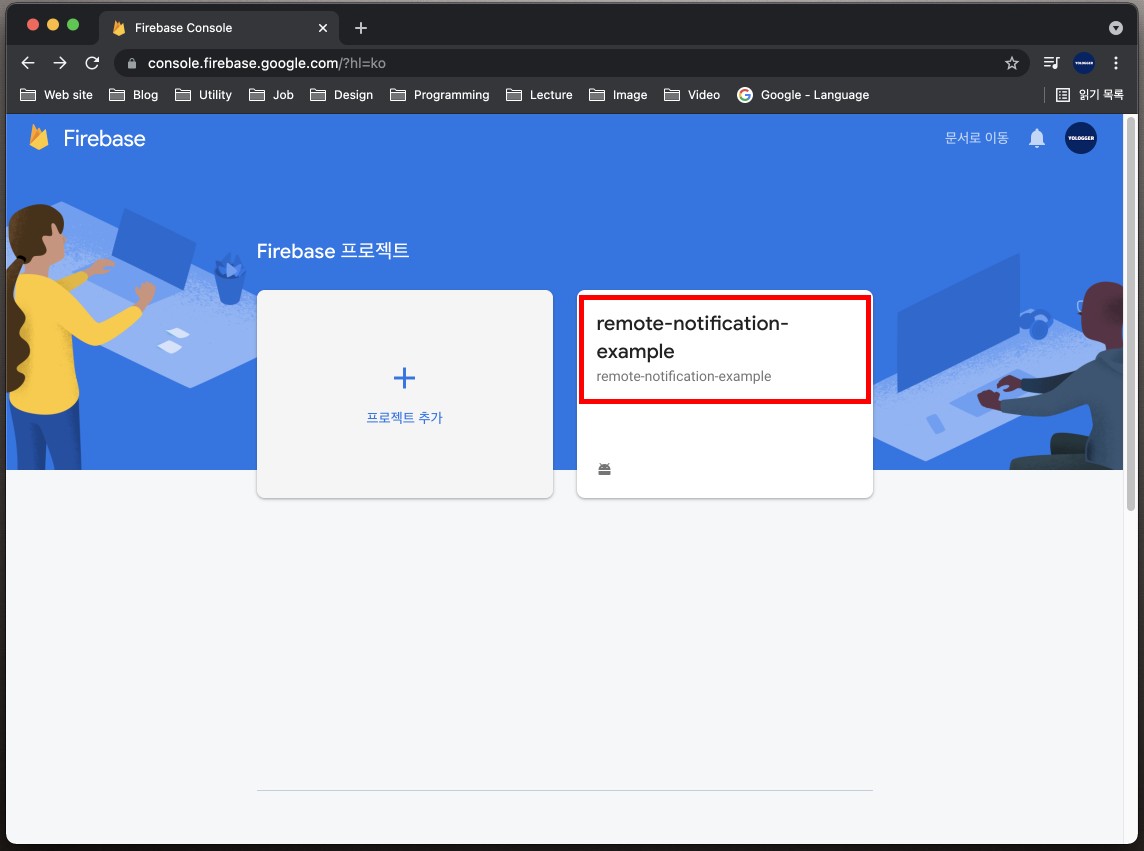
프로젝트가 정상적으로 생성되면 다음과 같은 화면이 나옵니다.
# 안드로이드 스튜디오 프로젝트와 파이어베이스 프로젝트 연동
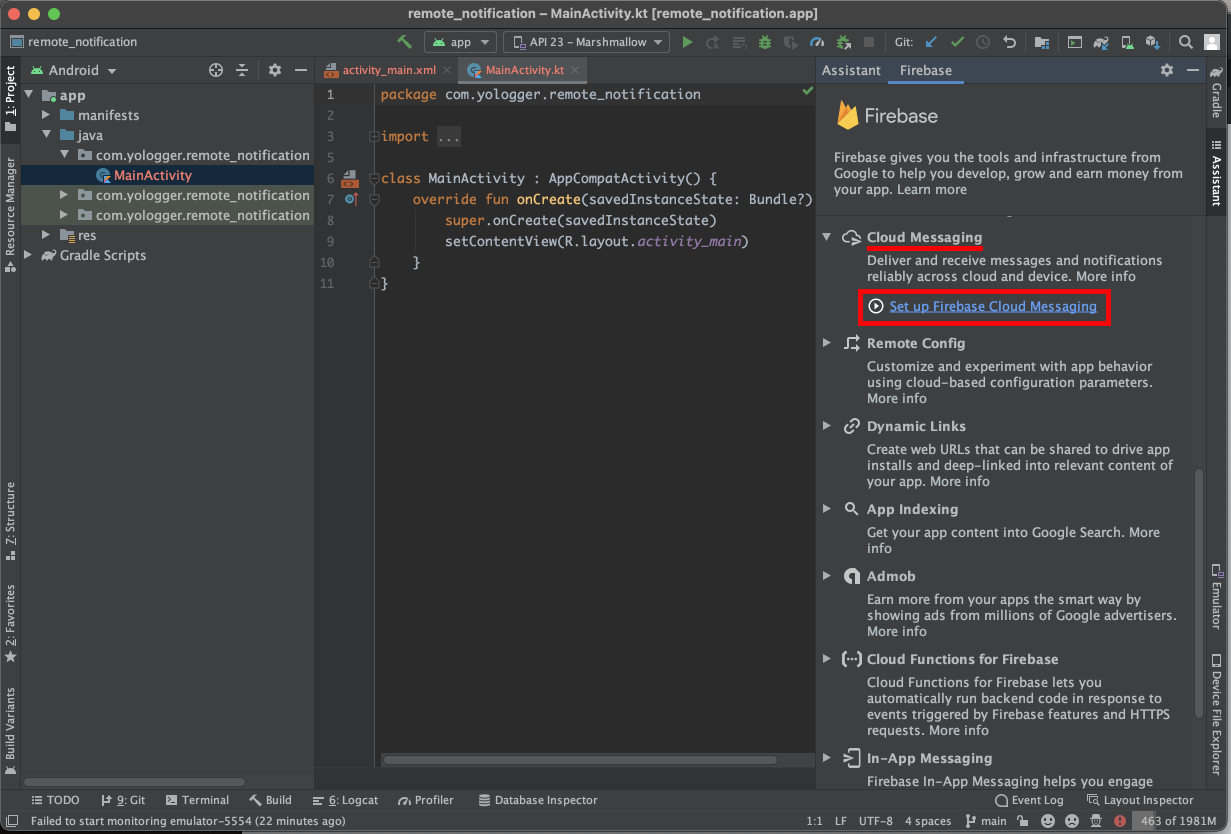
이제 안드로이드 스튜디오 프로젝트에서 Tool > Firebase를 선택합니다.
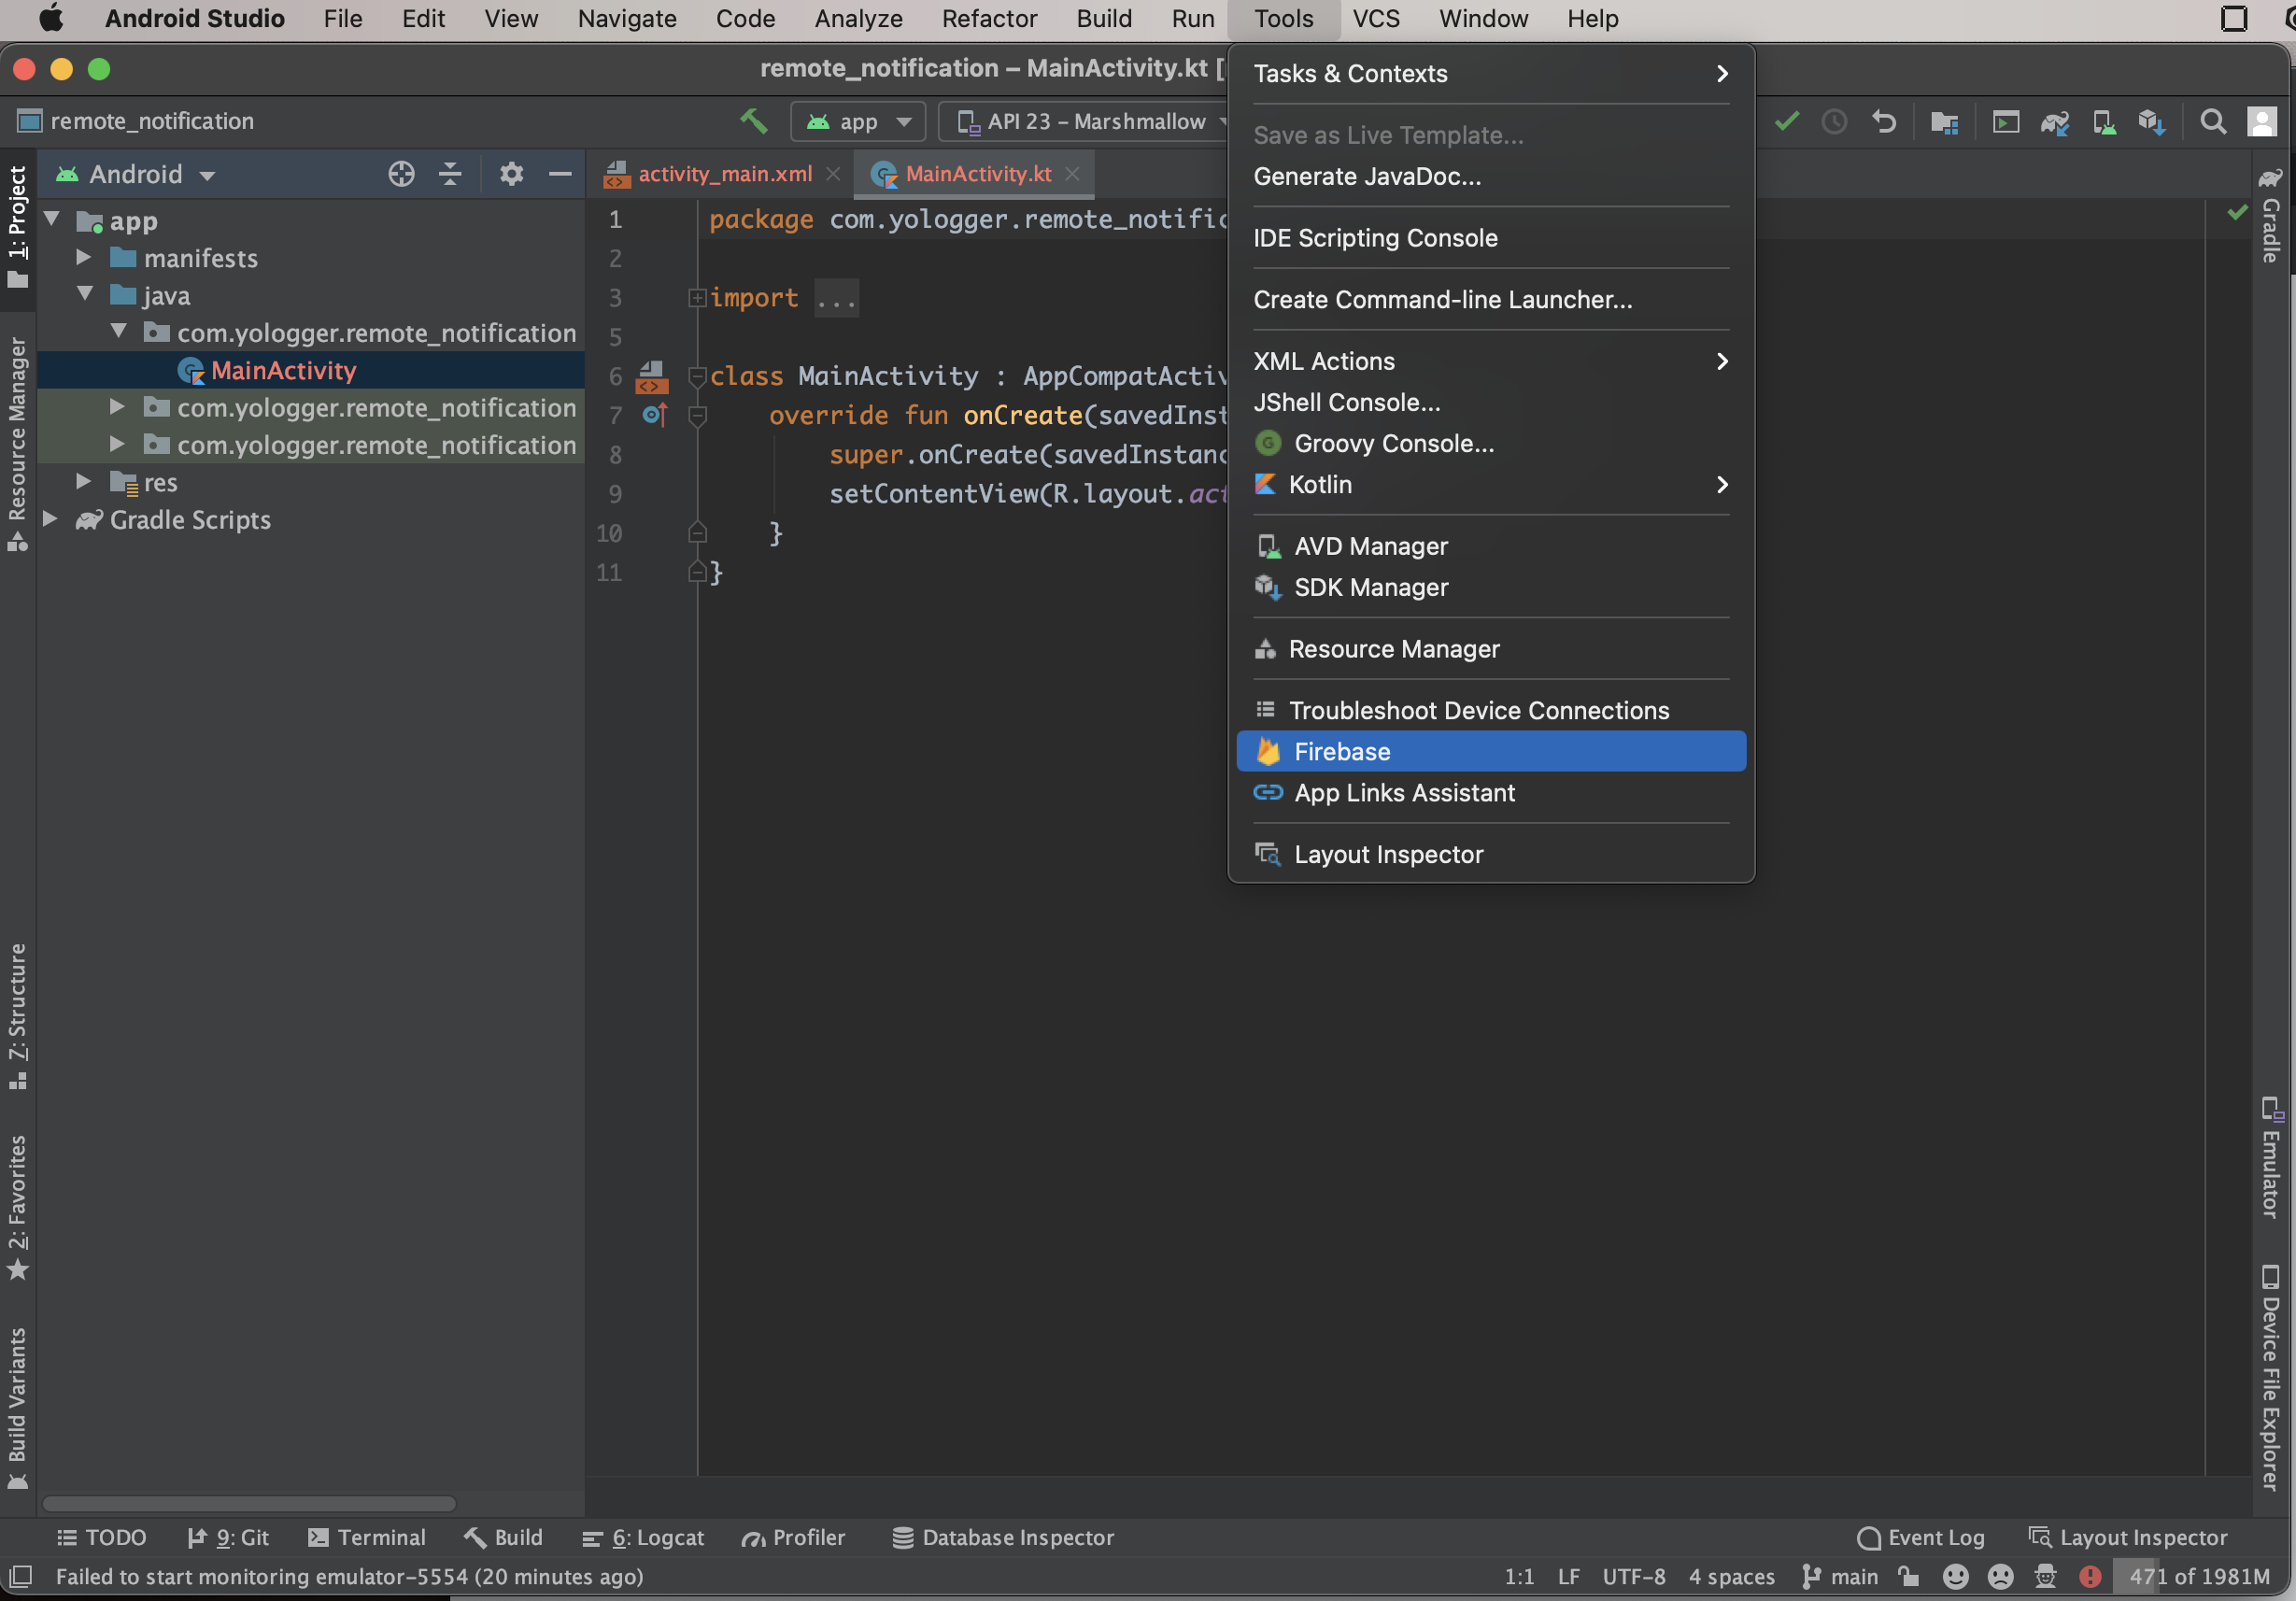
오른쪽 패널의 Assistant 도구 창에서 Cloud Messaging 항목을 찾습니다. 그리고 Set up Firebase Cloud Messaging을 클릭합니다.
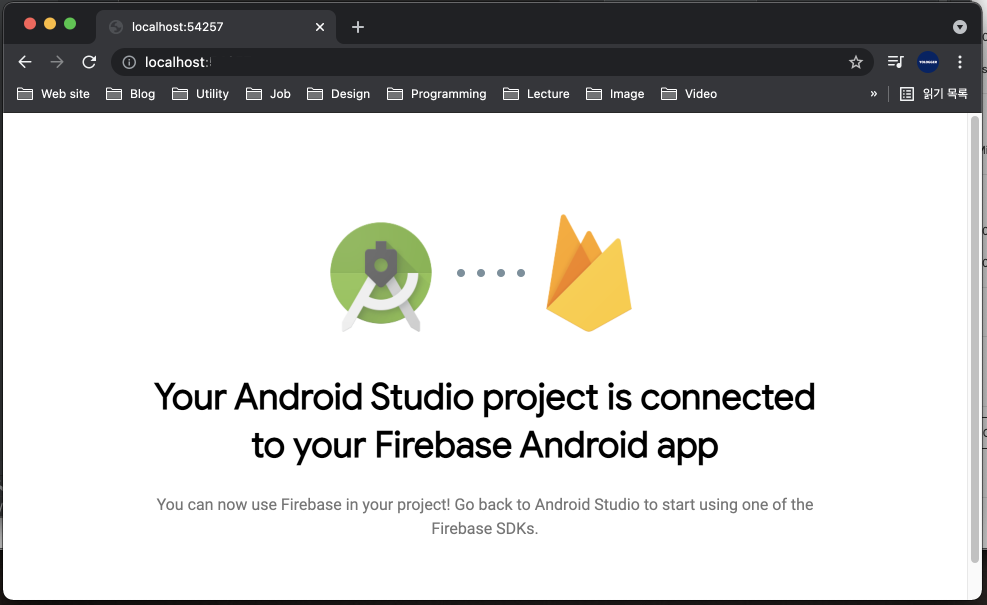
Connect to Firebase를 눌러 안드로이드 스튜디오 프로젝트와 파이어베이스 프로젝트를 연결합니다. 다음과 같은 화면이 나오면 정상적으로 연결된 것입니다.
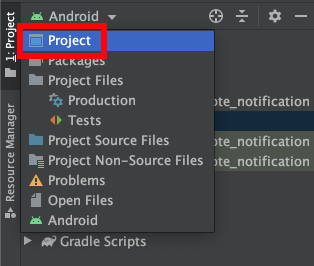
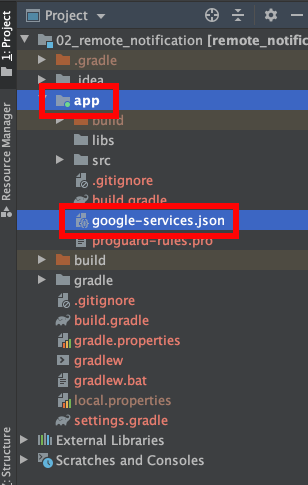
두 프로젝트가 연결되면 자동으로 google-services.json파일이 생성됩니다. 이 파일은 Firebase에서 안드로이드 프로젝트를 고유하게 식별하는 정보가 담겨있습니다. 프로젝트 도구창을 Android 뷰에서 Project 뷰로 전환합니다.
프로젝트의 app 모듈 아래에서 google-service.json파일을 확인할 수 있습니다.
# 파이어베이스 라이브러리 추가
이제 파이어베이스 라이브러리를 안드로이드 스튜디오 프로젝트에 추가해야합니다. 다시
오른쪽 패널의 Assistant 도구 창에서 Cloud Messaging 항목을 찾습니다. 그리고 Set up Firebase Cloud Messaging을 클릭합니다. 그리고 Add FCM to your app을 클릭합니다.

프로젝트에 추가되는 것들은 다음과 같습니다. 우선 프로젝트 수준의 build.gradle에 구글 서비스 라이브러리가 추가됩니다.
buildscript {
    dependencies {
        classpath 'com.google.gms:google-services:4.3.8'
        // ...
    }
}
모듈 수준의 build.gradle에는 Firebase 메시징 라이브러리와 구글 서비스 라이브러리 플러그인이 추가됩니다.
plugins {
    id 'com.google.gms.google-services'
    // ...
}

dependencies {
    implementation 'com.google.firebase:firebase-messaging:22.0.0'
    // ...
}
# 알림 보내기
앱을 실제 기기나 에뮬레이터에서 실행합니다. 그리고 홈 버튼을 눌러서 앱이 백그라운드에서 실행되도록 합니다. 앱이 실행 중이지 않거나 백그라운드에 있을 때만 원격 알림을 수신하기 때문입니다.
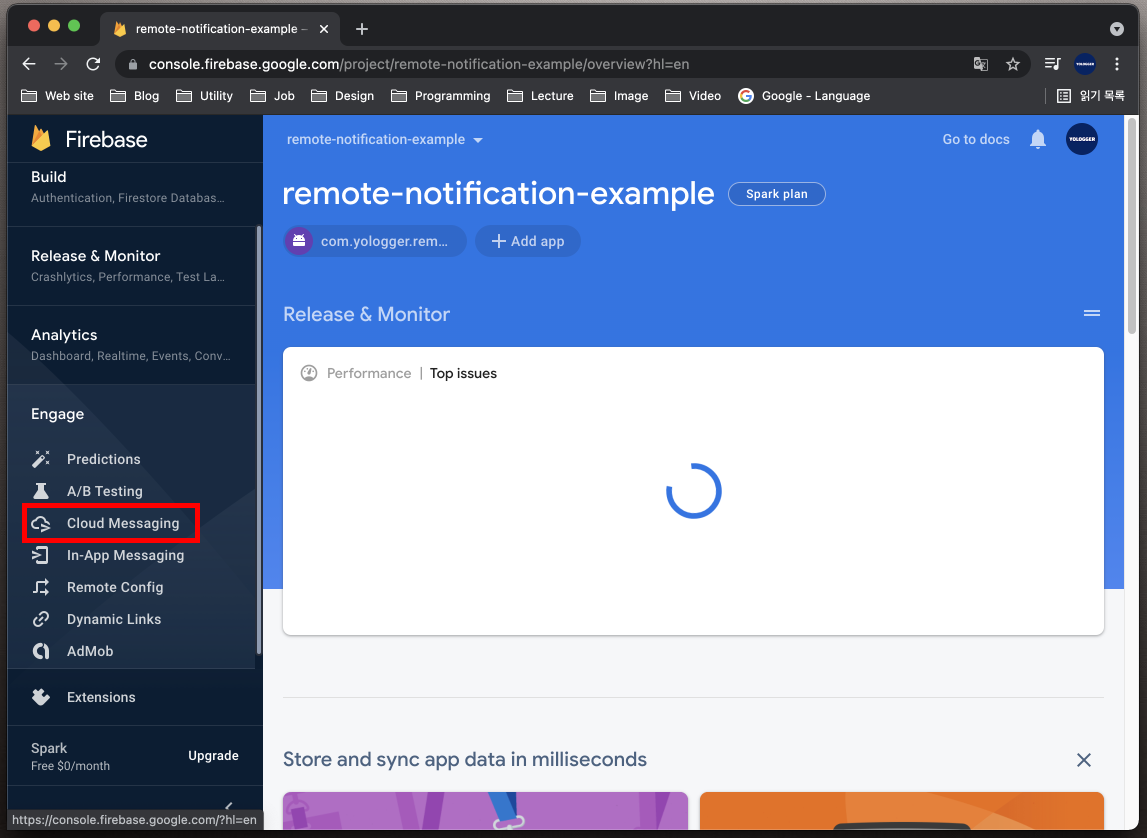
파이어베이스 콘솔에 접속하여 앞에서 생성한 프로젝트를 선택합니다.
왼쪽 사이드 바 메뉴에서 Cloud Messaging을 선택합니다.
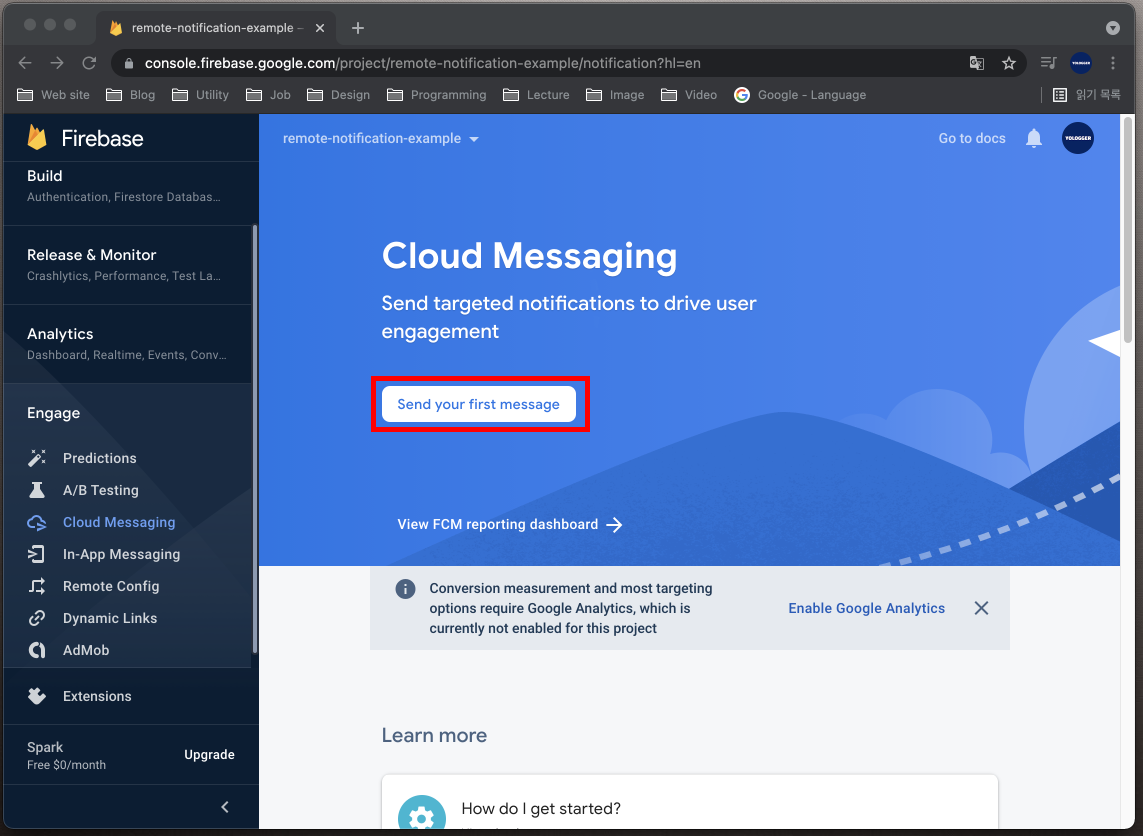
Send your first message를 클릭합니다.
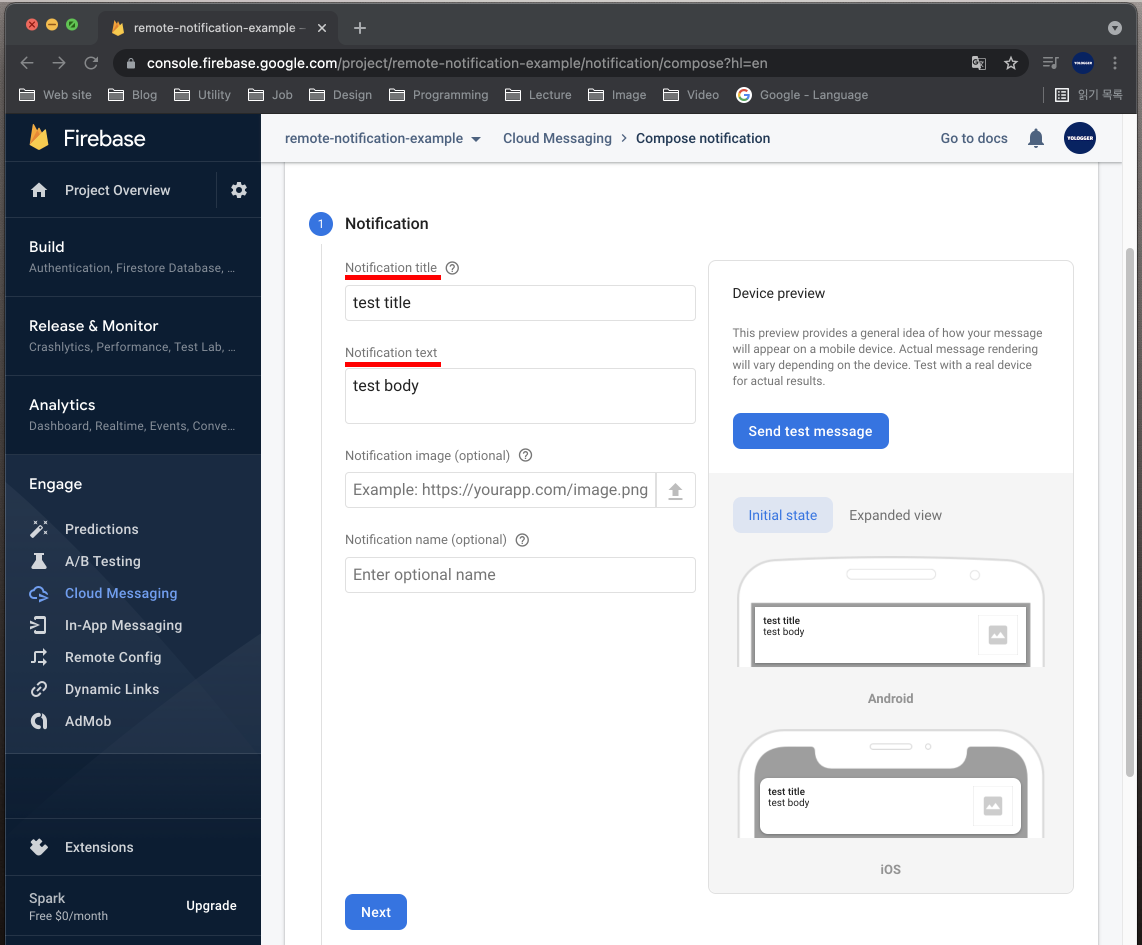
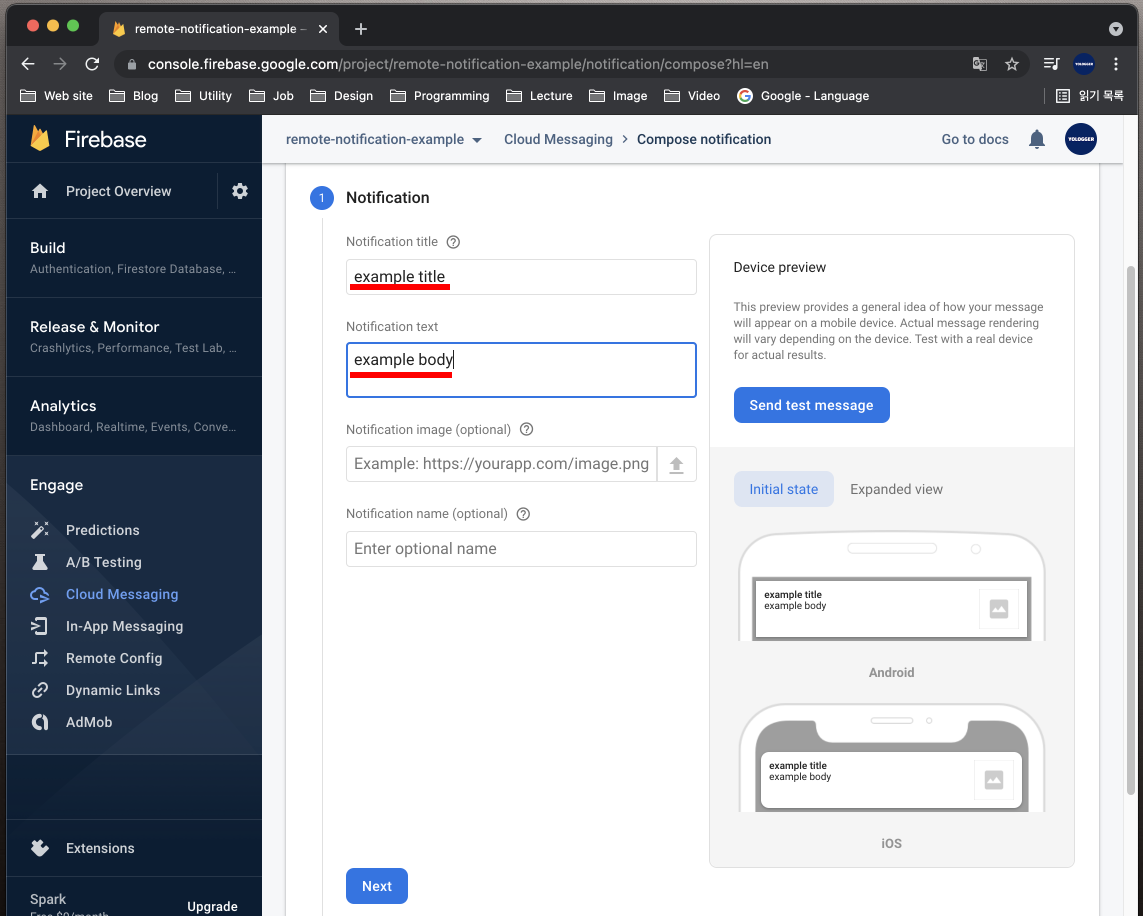
다음과 같이 알림 제목과 알림 텍스트를 입력합니다. 알림 이미지와 알림 이름은 선택사항입니다. 오른 쪽에서 어떻게 알림이 나올 지 확인할 수 있습니다. 이후 Next버튼을 누릅니다.
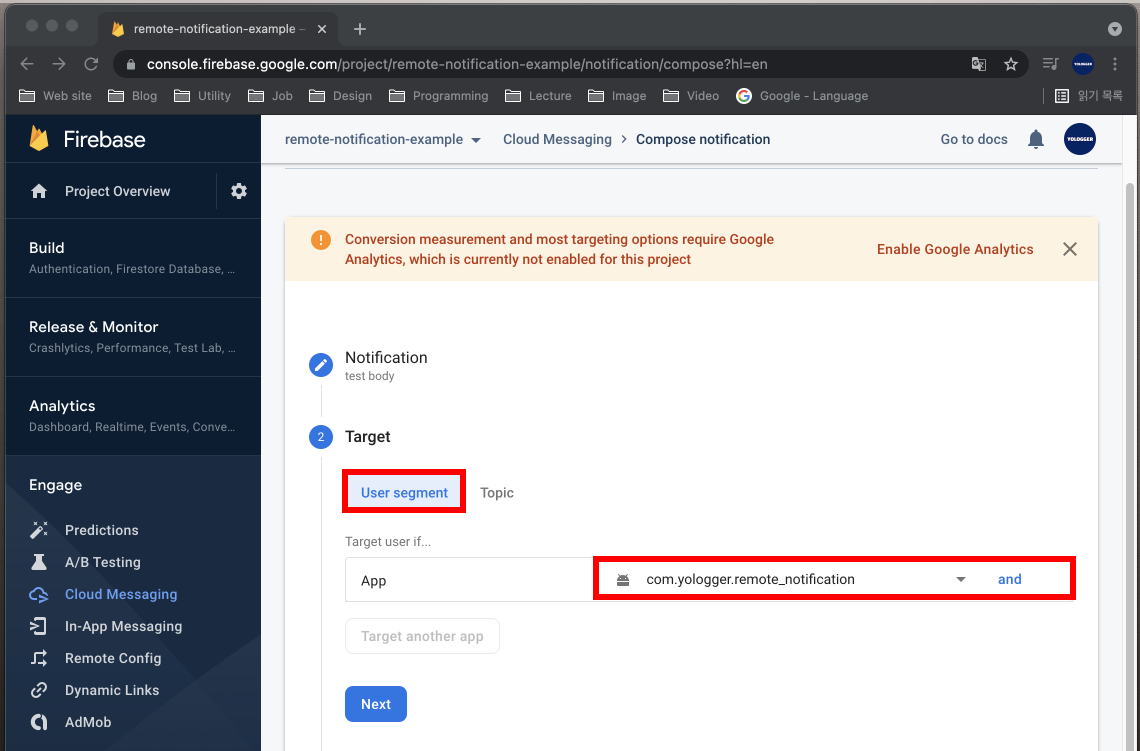
이제 어떤 앱과 어떤 사용자에게 알림을 보낼 지 설정합니다. User segment로 설정하면 앱의 모든 사용자에게 알림이 전송됩니다. 또한 어떤 앱에 알림을 보낼지 앱도 선택하고 Next 버튼을 누릅니다.
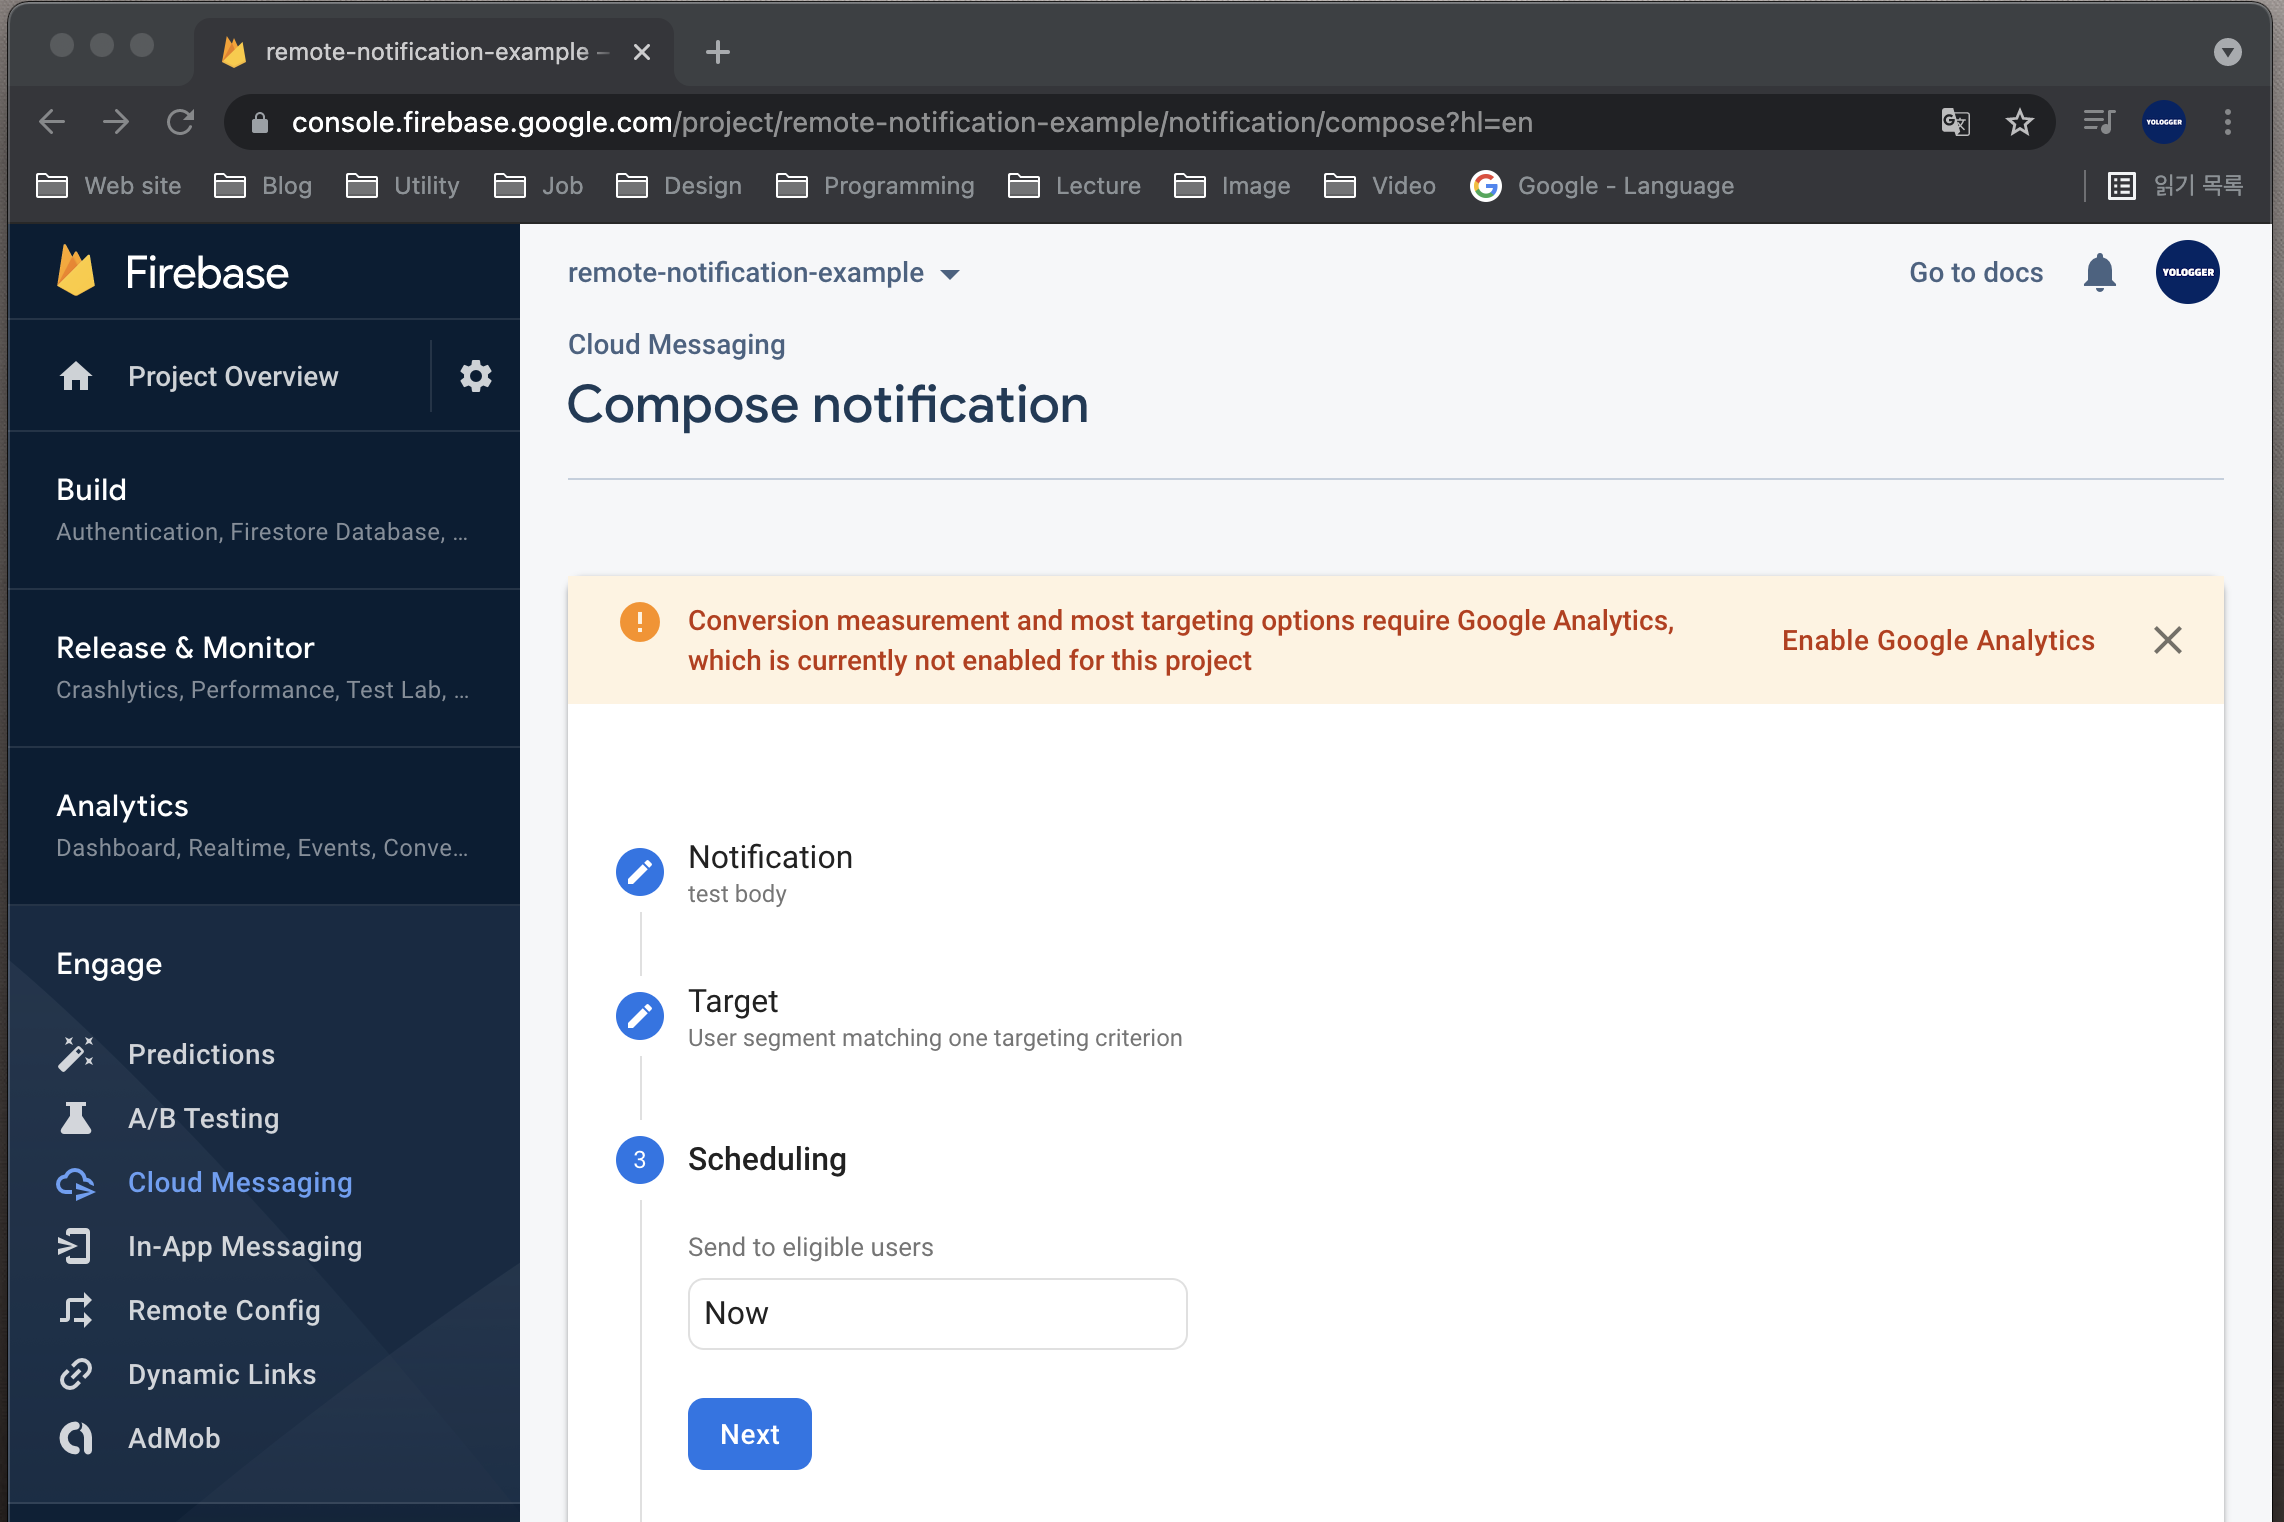
알림을 언제 보낼지를 설정할 수 있습니다. Now로 설정하고 Next버튼을 누릅니다.
Additional options는 선택사항입니다. 일단 비워두고 Review버튼을 누릅니다.

이제 검토창에서 게시를 누르면 알림이 발송됩니다.
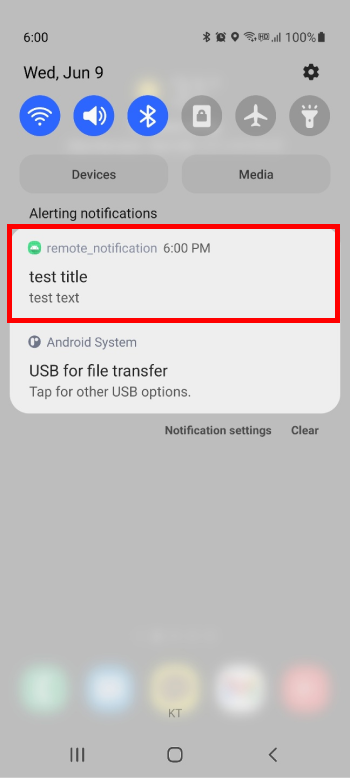
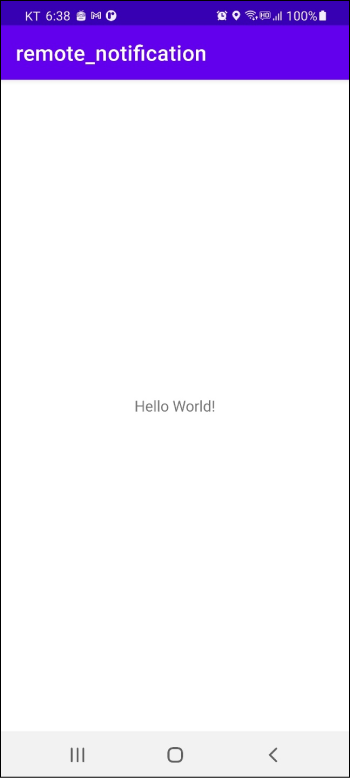
알림을 클릭하면 백그라운드 상태이던 앱이 포그라운드로 실행됩니다.
# 알림에 데이터 포함시키기
알림을 보낼 때 키-값 형태의 데이터를 추가할 수 있습니다. Additional Option 항목에서 데이터를 추가할 수 있습니다.
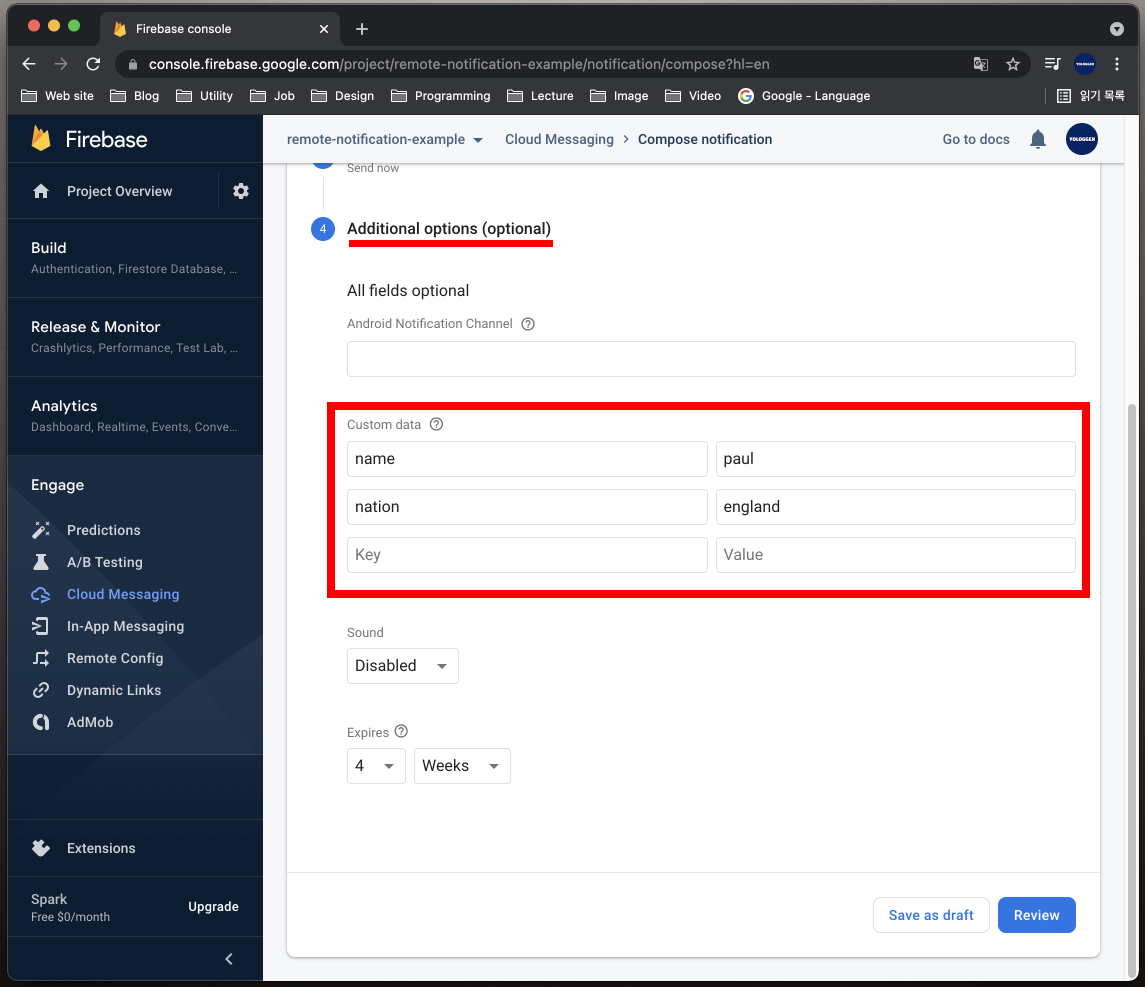
앱이 백그라운드에 진입하면 onPause()메소드가 호출됩니다. 알림을 클릭하여 앱이 포그라운드 상태로 변하면 onRestart() > onStart() > onResume()메소드가 순서대로 실행됩니다. 이 메소드 중 한 곳에서 데이터를 읽어올 수 있습니다. 데이터를 전달받아 토스트 메시지로 화면에 출력하겠습니다.
class MainActivity : AppCompatActivity() {
override fun onCreate(savedInstanceState: Bundle?) {
super.onCreate(savedInstanceState)
setContentView(R.layout.activity_main)
}
override fun onStart() {
super.onStart()
val extras = intent.extras
extras?.run {
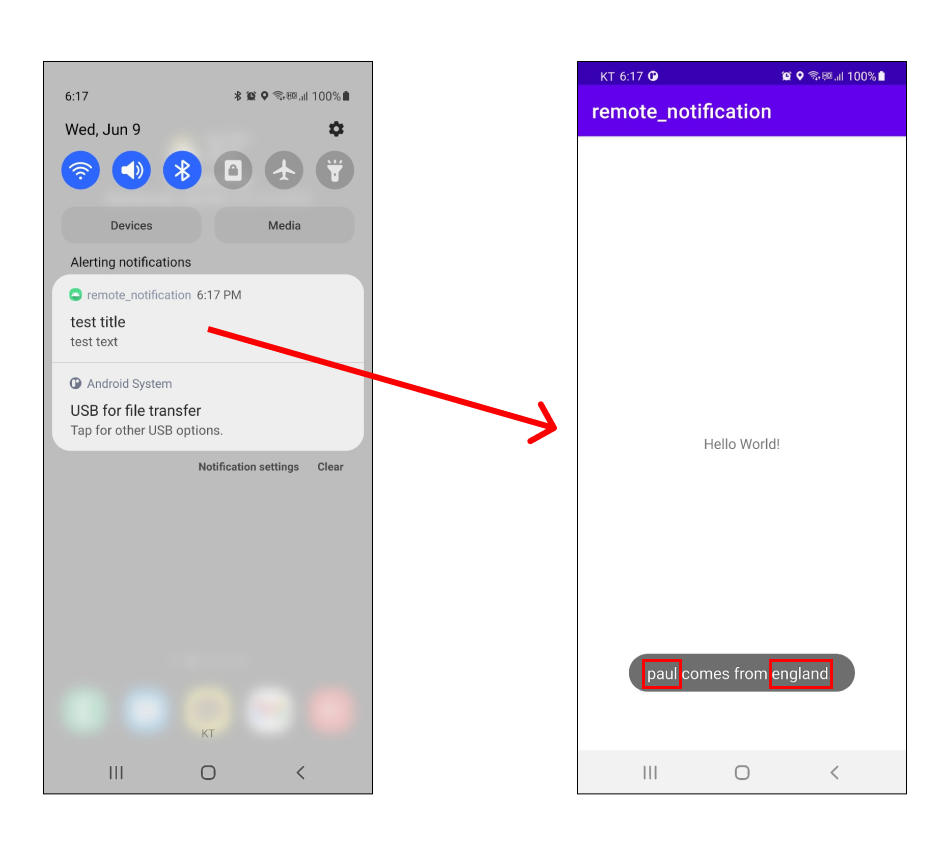
val name = getString("name")
val nation = getString("nation")
if (name != null && nation != null) {
Toast.makeText(this@MainActivity, "${name} comes from ${nation}. ", Toast.LENGTH_SHORT).show()
}
}
}
}
이제 앱을 실행하고 백그라운드 모드로 변경한 후 알림을 전송합시다. 알림을 클릭하면 다음과 같이 토스트 메시지가 나옵니다.
# 포그라운드 상태에서 원격 알림 받기
현재 포그라운드로 실행되고 있는 앱은 Firebase 알림을 받지 못합니다. 포그라운드 상태에서 알림을 받으려면 FirebaseMessagingService클래스를 구현하고 onMessageReceived()메서드를 오버라이딩 해야합니다. MyFBMessageService라는 클래스를 다음과 같이 구현합니다.
class MyFBMessageService : FirebaseMessagingService() {

    override fun onMessageReceived(remoteMessage: RemoteMessage) {
        super.onMessageReceived(remoteMessage)
        // Do somthing when you receive a message.
    }
}
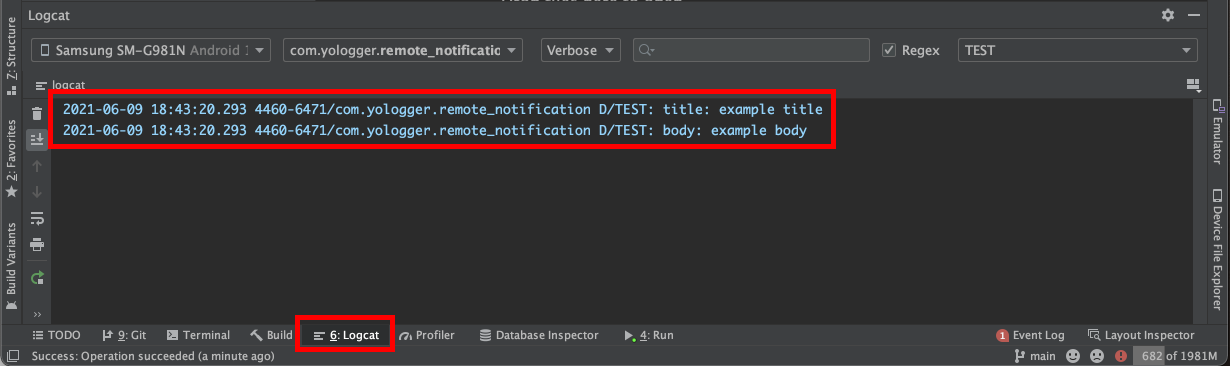
onMessageReceived()메소드가 호출될 때는 RemoteMessage객체를 인자로 받습니다. 이 객체에는 알림의 제목과 내용같은 정보가 담겨있습니다. 제목과 내용을 로그에 출력해보겠습니다.
class MyFBMessageService : FirebaseMessagingService() {

    override fun onMessageReceived(remoteMessage: RemoteMessage) {
        super.onMessageReceived(remoteMessage)

        // 제목
        val title = remoteMessage.notification?.title

        // 내용
        val body = remoteMessage.notification?.body

        Log.d("TEST", "title: ${title}")
        Log.d("TEST", "body: ${body}")
    }
}
마지막으로 AndroidManifest.xml에 Firebase 메시징과 관련된 액션을 수신할 수 있도록 인텐트 필터를 추가합니다.
<?xml version="1.0" encoding="utf-8"?>
<manifest xmlns:android="http://schemas.android.com/apk/res/android"
    package="com.yologger.remote_notification">

    <application android:allowBackup="true"
        android:icon="@mipmap/ic_launcher"
        android:label="@string/app_name"
        android:roundIcon="@mipmap/ic_launcher_round"
        android:supportsRtl="true"
        android:theme="@style/Theme.Remote_notification">

        <service android:name=".MyFBMessageService"
            android:enabled="true"
            android:exported="true">
            <intent-filter>
                <action android:name="com.google.firebase.MESSAGING_EVENT"/>
            </intent-filter>
        </service>

        <!-- ... -->
    </application>

</manifest>
이제 앱을 실행시킵니다. 홈 버튼을 누르지 않고 앱을 포그라운드 상태로 유지합니다.
Firebase 콘솔에서 알림을 보냅시다.
그러면 로그에 다음과 같은 내용이 출력됩니다.
← 안드로이드 권한 관리 ADB →